
How to create a class
Before you can take attendance you create the class once. A one-time job.
The screenshots show the app in Bangla, its main language. The buttons sit in the same places in English.
-
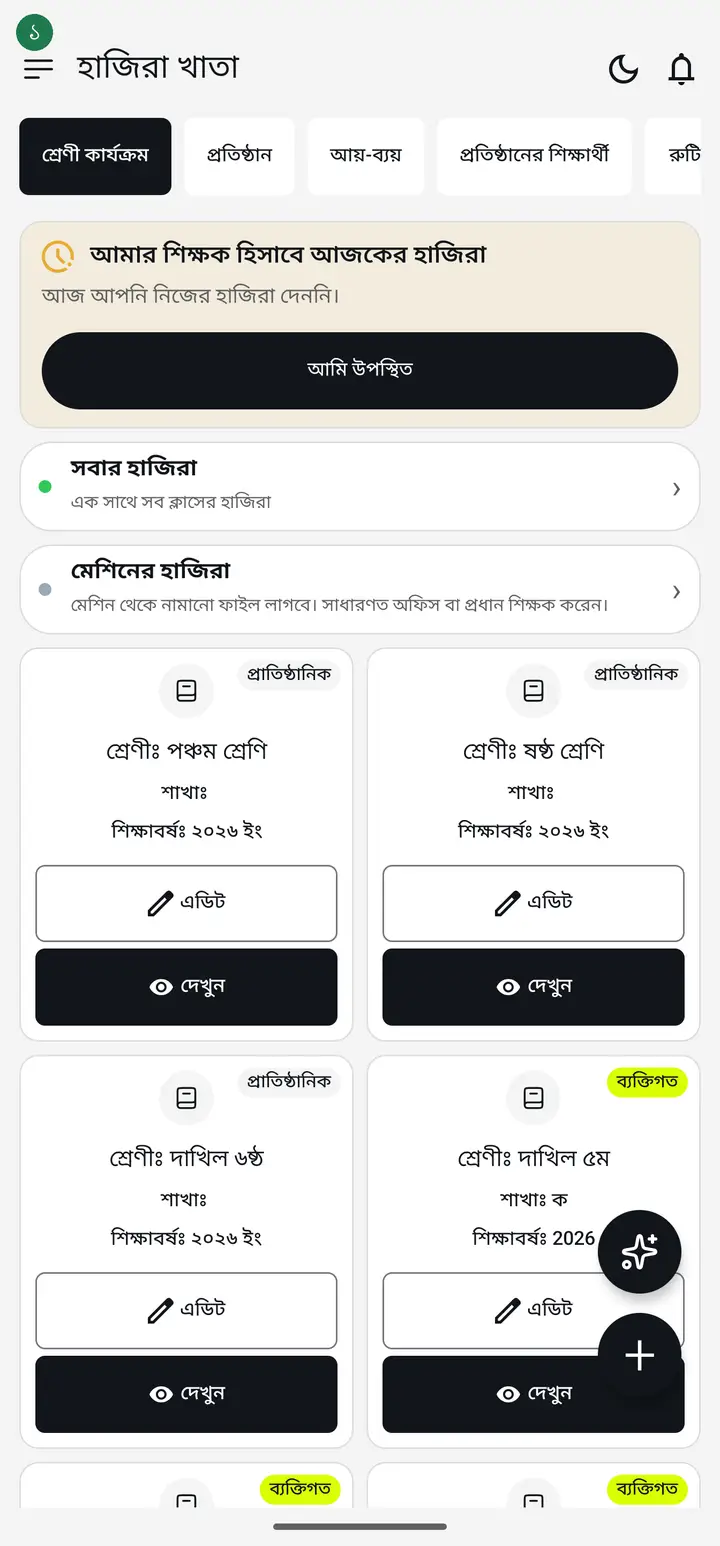
Open the app. You are already on the "শ্রেণী কার্যক্রম" (Classes) page.
-
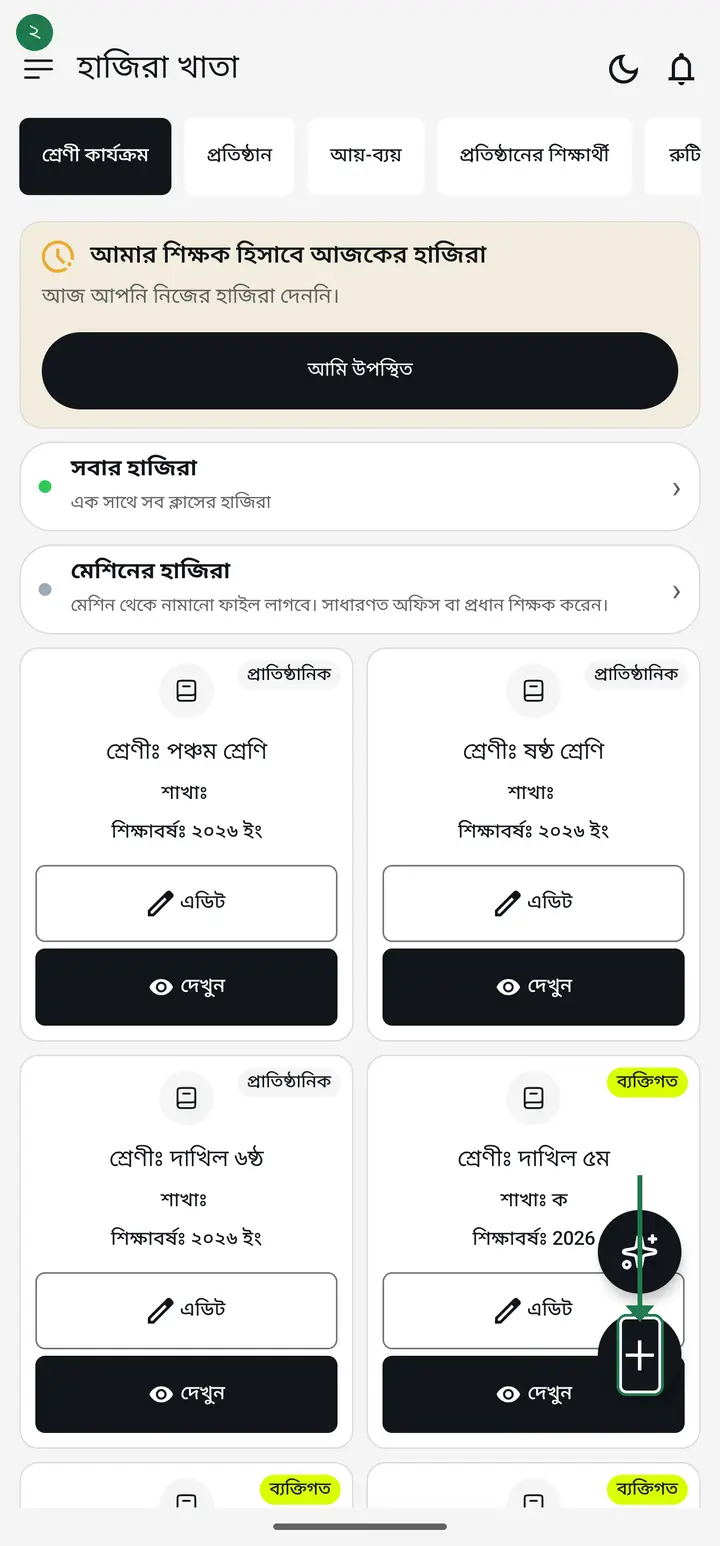
Tap the round plus (+) button at the bottom right.
-
A question appears — "কোন ধরনের ক্লাস?" (what kind of class?). Two rows. If you teach alone — coaching, a private batch, students at home — tap "নিজের ক্লাস" (my own class). For a school, madrasah or college class that other teachers of the institution will also see, tap "প্রতিষ্ঠানের ক্লাস" (institution class). One tap opens the next page — there is no separate button to press afterwards.
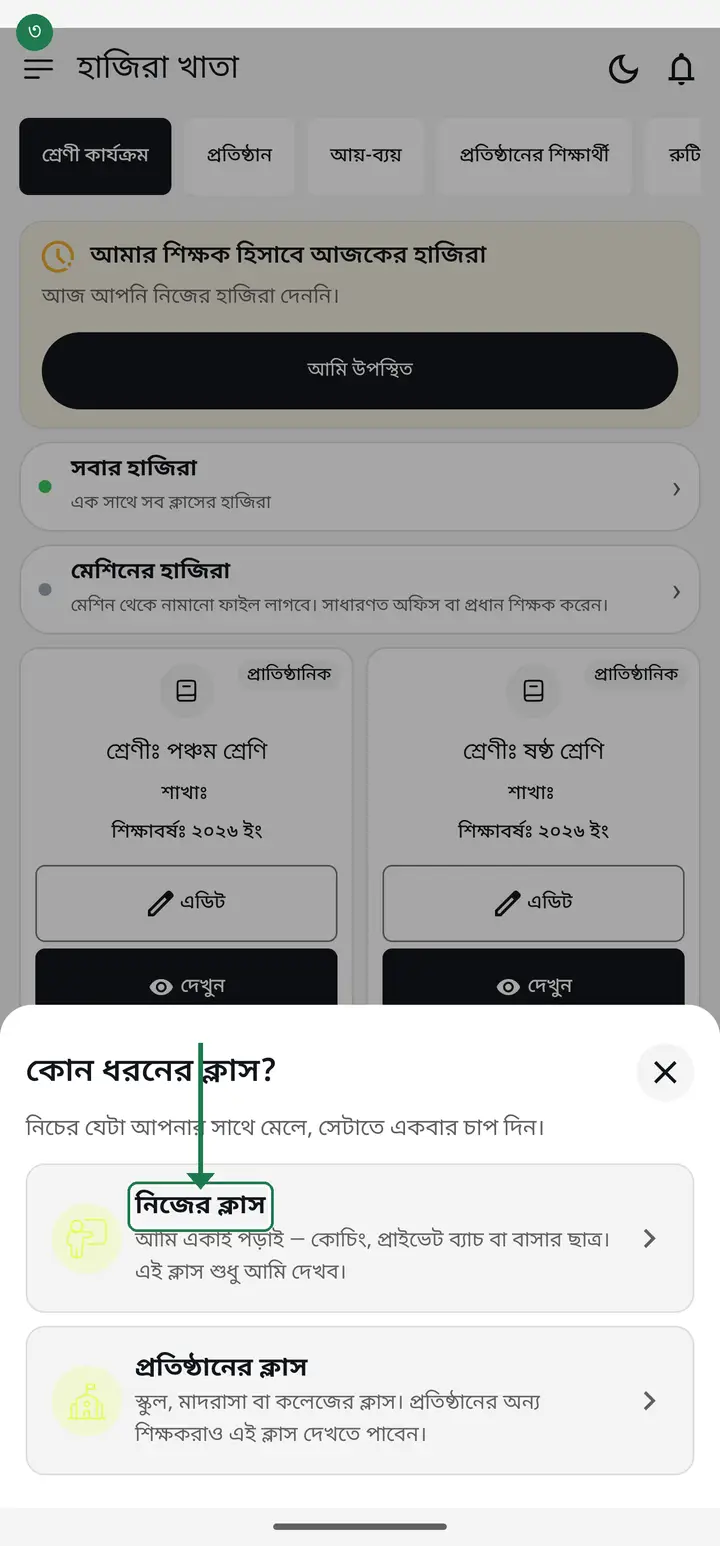
A class you want to hand to a teacher MUST be an institution class. A "my own class" has no class-teacher box at all — this is where many people get stuck.
-
If you have no institution yet, under "প্রতিষ্ঠানের ক্লাস" you will see amber text — "প্রতিষ্ঠান তৈরি করুন বা যুক্ত হন" (create or join an institution). Tapping it opens the institution form. Once the institution exists you can create institution classes.
-
In "নতুন ক্লাসের নাম*" (New class name) type the class name — for example দাখিল ৫ম or নূরানী ১ম.
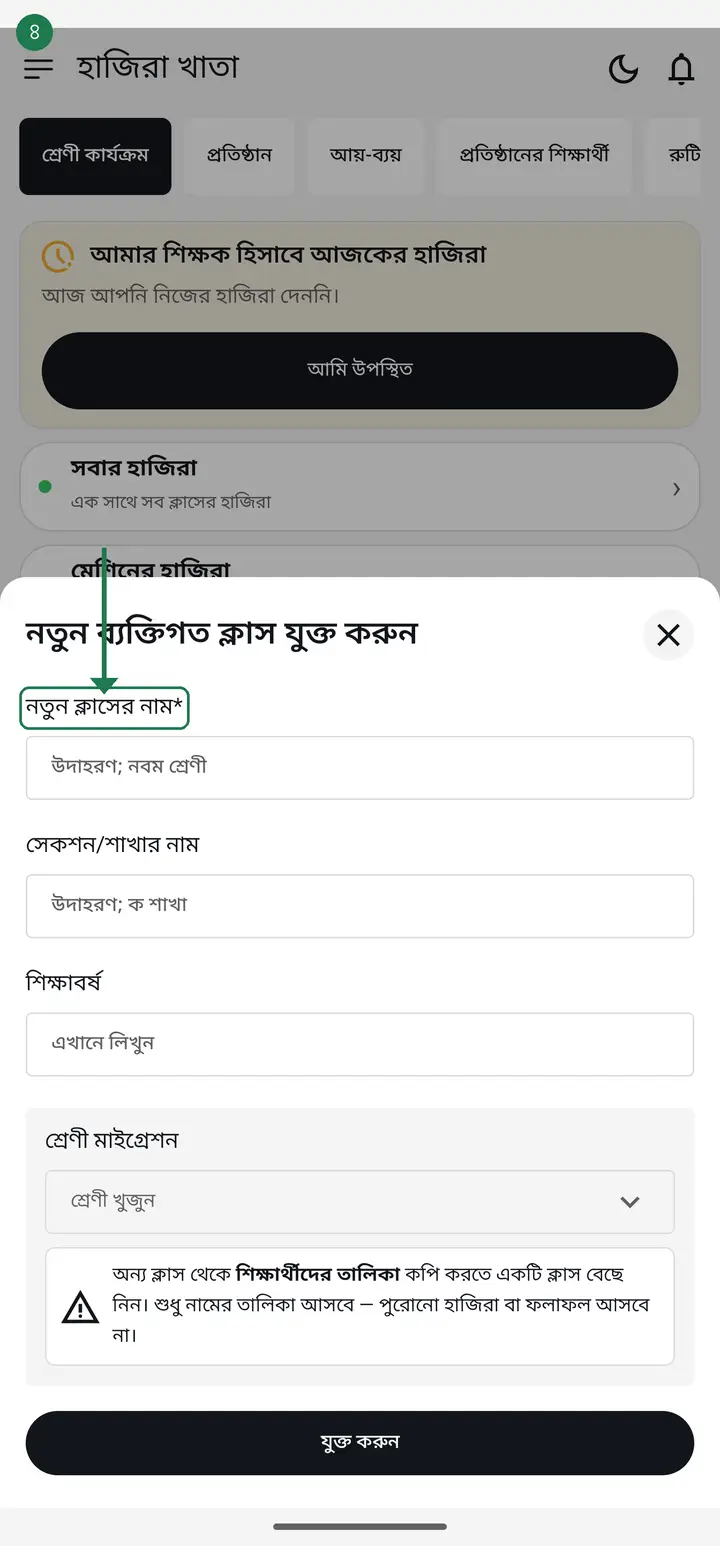
The star (*) means this field cannot be empty. It will not save if you leave it blank.
-
If the class has a section, type it in "সেকশন/শাখার নাম" — for example ক. If not, leave it empty; that is fine.
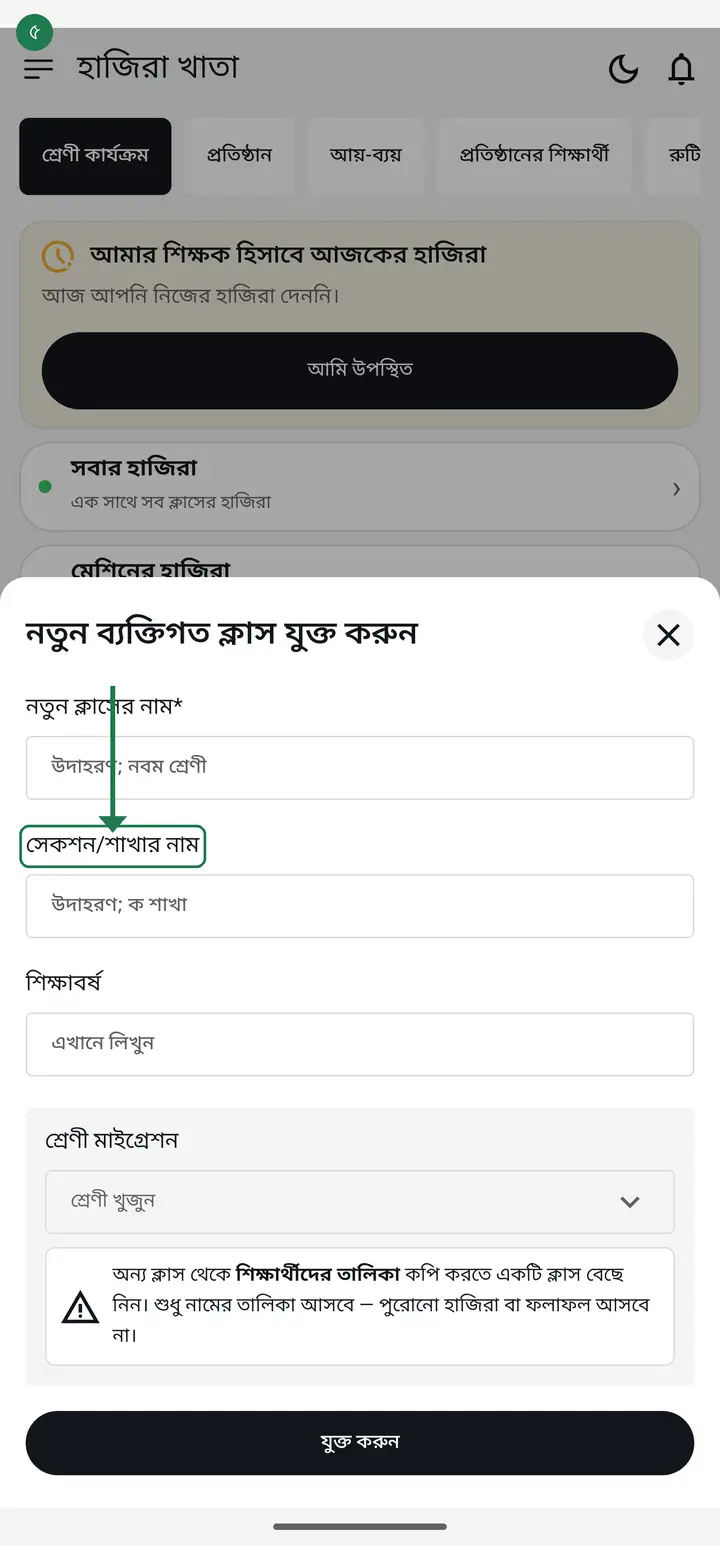
Do not type the section inside the class-name box. Name box gets only "প্রথম শ্রেণী", section box only "ক". The app prints "শাখাঃ ক" as its own line everywhere — class card, student profile, marksheet, ID card. Put it in the name too and it shows twice.
-
If one class has several sections — ক, খ, গ — create one class per section. Keep exactly the same "নতুন ক্লাসের নাম*" and change only "সেকশন/শাখার নাম". Three sections means doing this three times: প্রথম শ্রেণী + ক, প্রথম শ্রেণী + খ, প্রথম শ্রেণী + গ. That is the correct way, nothing is going wrong.
If "এই ক্লাসটি আগে থেকেই থাকতে পারে" (this class may already exist) appears while creating the second section, do not panic. When the sections really are different, tap "তবুও নতুন বানান" (create anyway). If you leave the section box empty and reuse the same name, this warning always appears — that is the sign the section box was left blank.
-
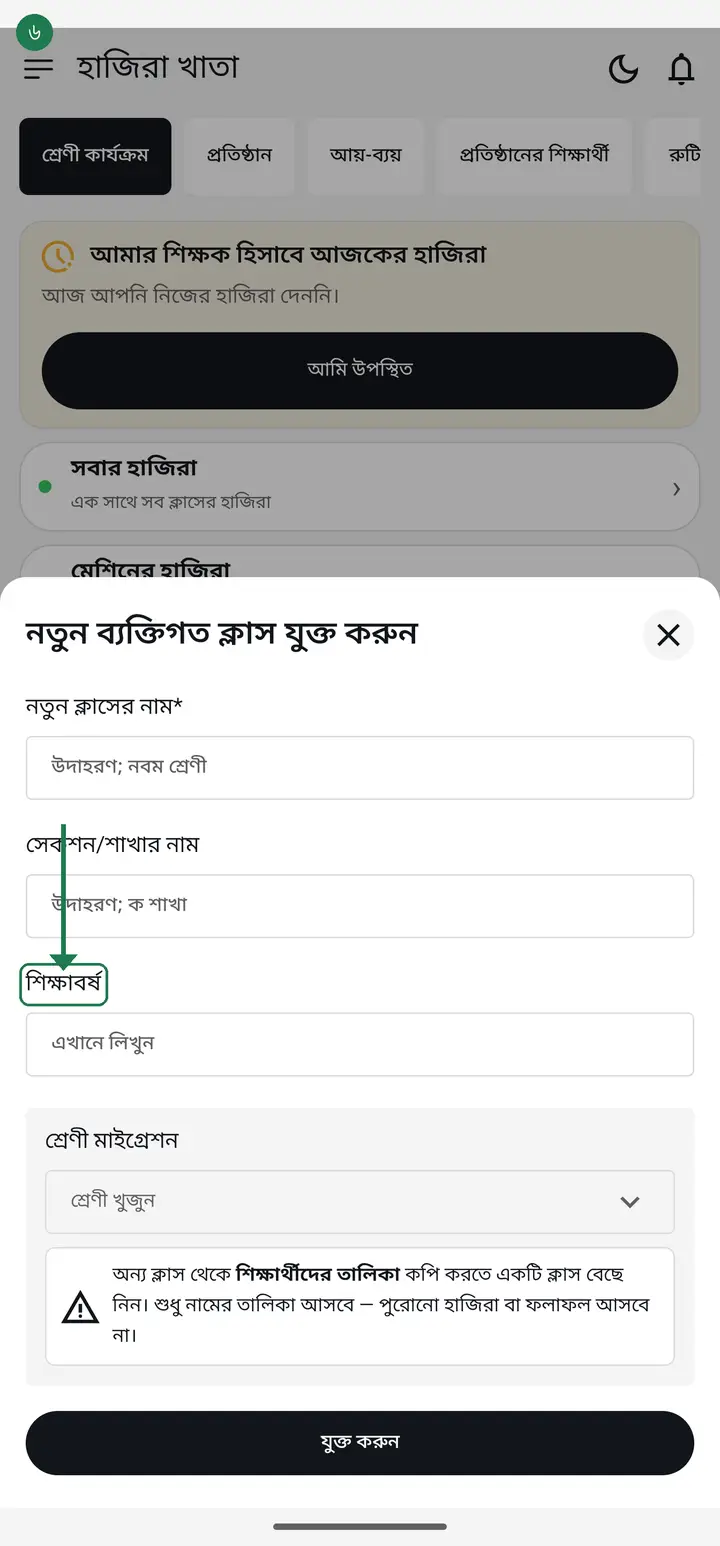
In "শিক্ষাবর্ষ" (Academic year) type the year — for example ২০২৬.
-
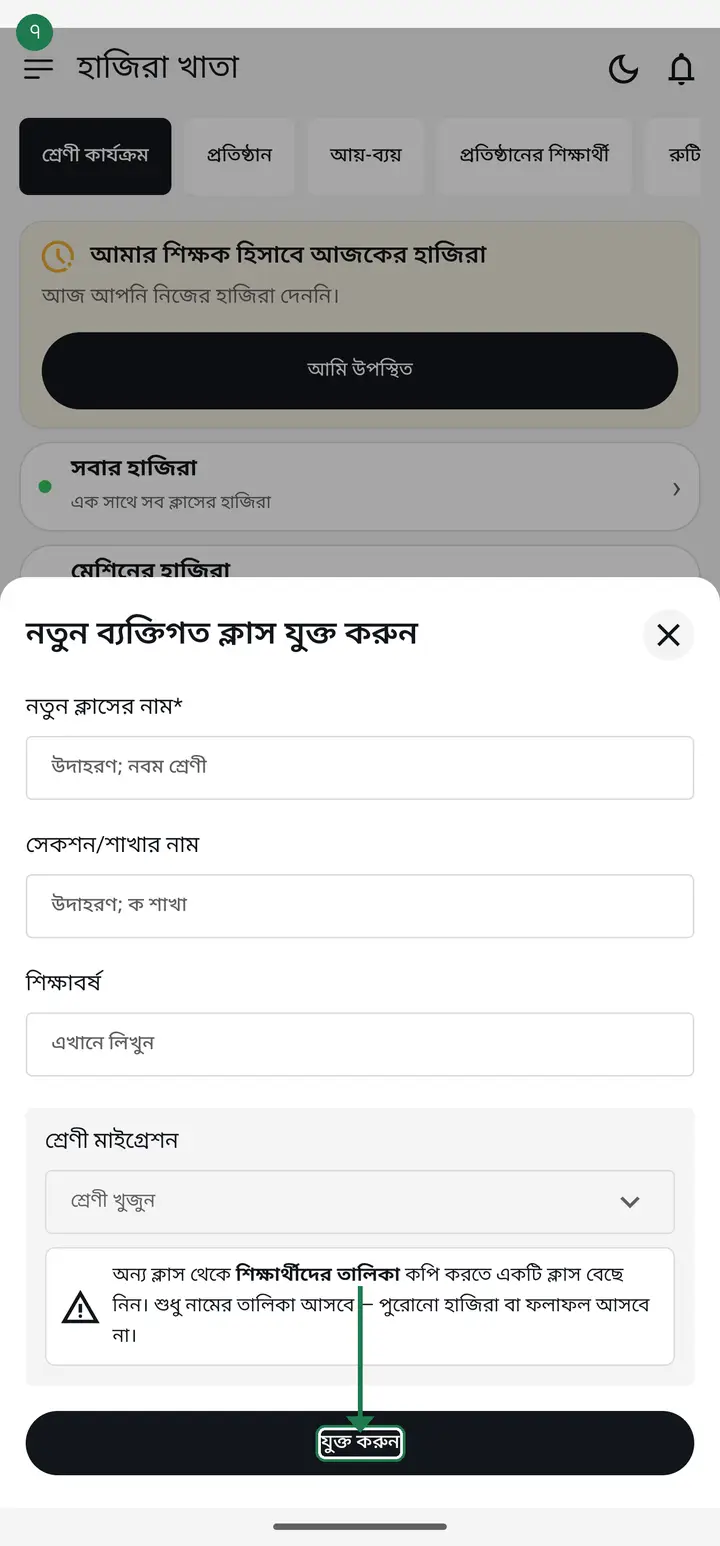
Tap "যুক্ত করুন" (Add). When you see "ক্লাস সফলভাবে তৈরি হয়েছে।" (Class created successfully) it is done.
-
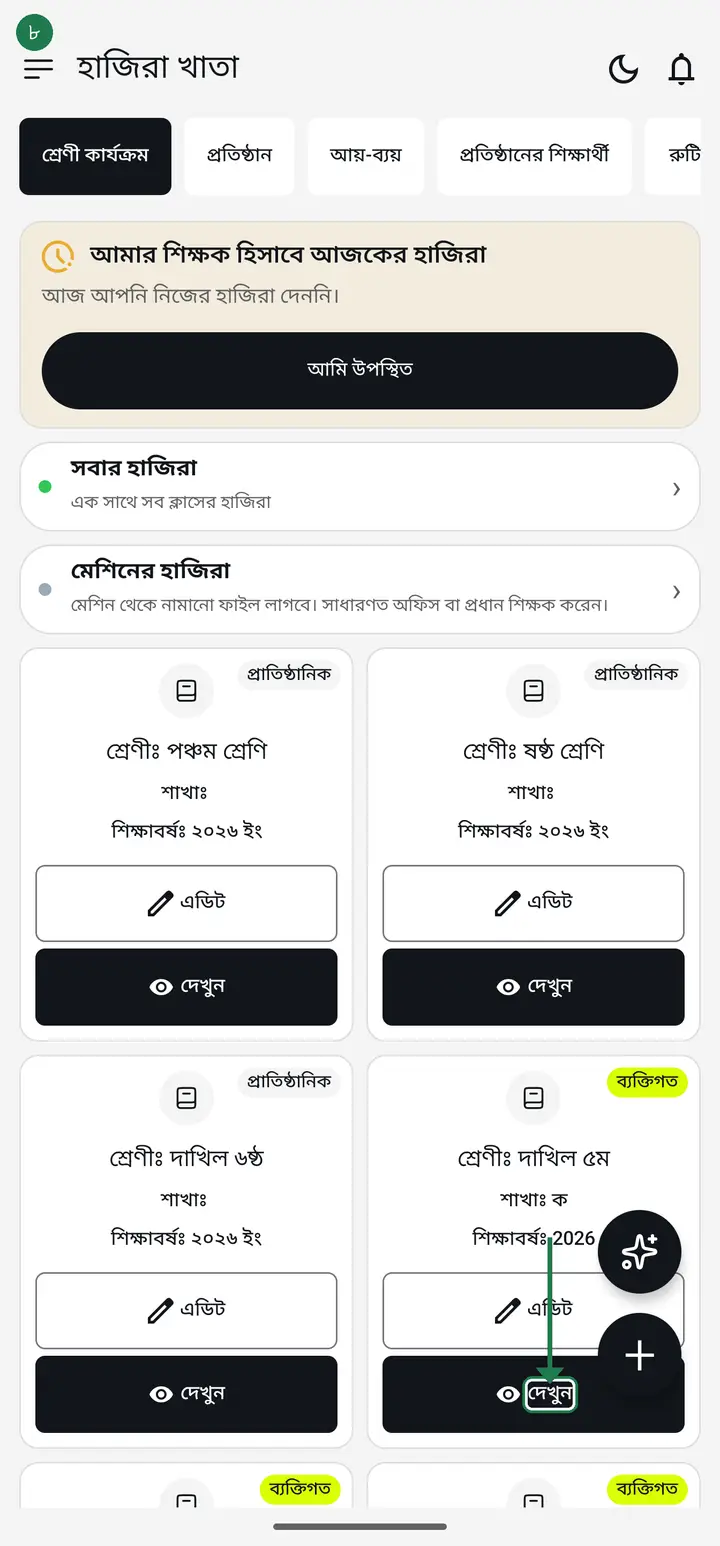
Now tap "দেখুন" (View) on the class card to go inside — attendance, fees and results all start from there.
Common questions
What if a class with the same name already exists?
The app warns you with "এই ক্লাসটি আগে থেকেই থাকতে পারে" (This class may already exist). You then choose to open the old one or create a new one anyway. Two copies of the SAME class split your attendance across both, so it is worth checking first. But same name with a different section is not a mistake — that is the correct setup, so tap "তবুও নতুন বানান" (create anyway).
One class with three sections — do I create one class or three?
Three. One section is one class. Attendance, fees, results and the class teacher all work per class, so putting ক and খ into a single class mixes the two rolls and they cannot be separated again. Create three classes with exactly the same name and only ক / খ / গ in the section box.
We have opened a new wing (a school wing alongside the madrasa) — how do I add the wing?
There is nothing separate to add. Just create the new wing's classes the same way as any other class. One institution holds every kind of class at once, and the class name is what tells them apart — "দাখিল ৫ম" and "পঞ্চম শ্রেণী" sitting side by side is fine, and attendance, fees and results stay separate per class anyway. Note that the "সেকশন/শাখার নাম" box on this page is NOT for this: that is the ক / খ / গ section inside a single class. One thing to know up front so it is not a surprise later: per-wing totals (what did the school wing collect this month) do not exist yet — figures are per class or for the whole institution.
I forgot the section while creating the class — what now?
On the "শ্রেণী কার্যক্রম" page tap "এডিট" on that class card — or open the class and tap the pencil on the right of the top card. The "ক্লাস এডিট করুন" page opens. Fill "সেকশন/শাখার নাম" and tap "আপডেট" (Update). Nothing is lost — no student, no attendance; the section is simply added beside the name. On an institutional class only a head teacher or admin can do this; a class teacher sees "এই তথ্য পরিবর্তনের জন্য হাজিরা খাতা এডমিন অথবা প্রধান শিক্ষকের সাথে যোগাযোগ করুন".
What is the difference between a personal and an institutional class?
A personal class is yours alone — only you see it. An institutional class belongs to the school, so other teachers there can see it too. Creating an institutional class requires an institution profile first.
Do I need internet to create a class?
You can create a personal class without internet and it syncs by itself later. An institutional class needs internet.
Ask AI about this page
Ask an AI app to explain this page in simple language.
Copied — now paste it
Get Hazira Khata free on Google Play
More tutorials
- How to sign in Signing in for the first time with your phone number. No email or password needed.
- Add a second way to sign in to one account Add Gmail to an account created with a phone number. It stays one account and nothing inside it changes.
- How to mark your own attendance As a teacher you can record your own daily attendance — it takes one tap.
- Check your salary and sign "received" When your school records your salary, the app tells you. Check the receipt and tap "বেতন বুঝে পেয়েছি" (Salary received) to leave your own digital signature — proof for both sides.
- Make receipts and results look right — font and size Documents printing in an ugly font? Change it in one place and the receipt, result slip and certificate all change together.
- How to add students Enter each student's name and roll once. After that, daily attendance is just ticking boxes.
- How to add a whole class at once You do not have to type 40 names one by one. Type or paste the list and add everyone at once — no computer needed.
- How to take attendance Daily attendance takes less than a minute. Follow the pictures.