
How to make admit cards and seat cards
Make and print exam admit cards and seat cards yourself — with the logo, signatures and dates. Both live on one screen, as two tabs at the top.
The screenshots show the app in Bangla, its main language. The buttons sit in the same places in English.
-
Tap "দেখুন" (View) on the class card, then tap "প্রবেশপত্র/আসনপত্র প্রিন্ট করুন" (Print admit/seat cards).
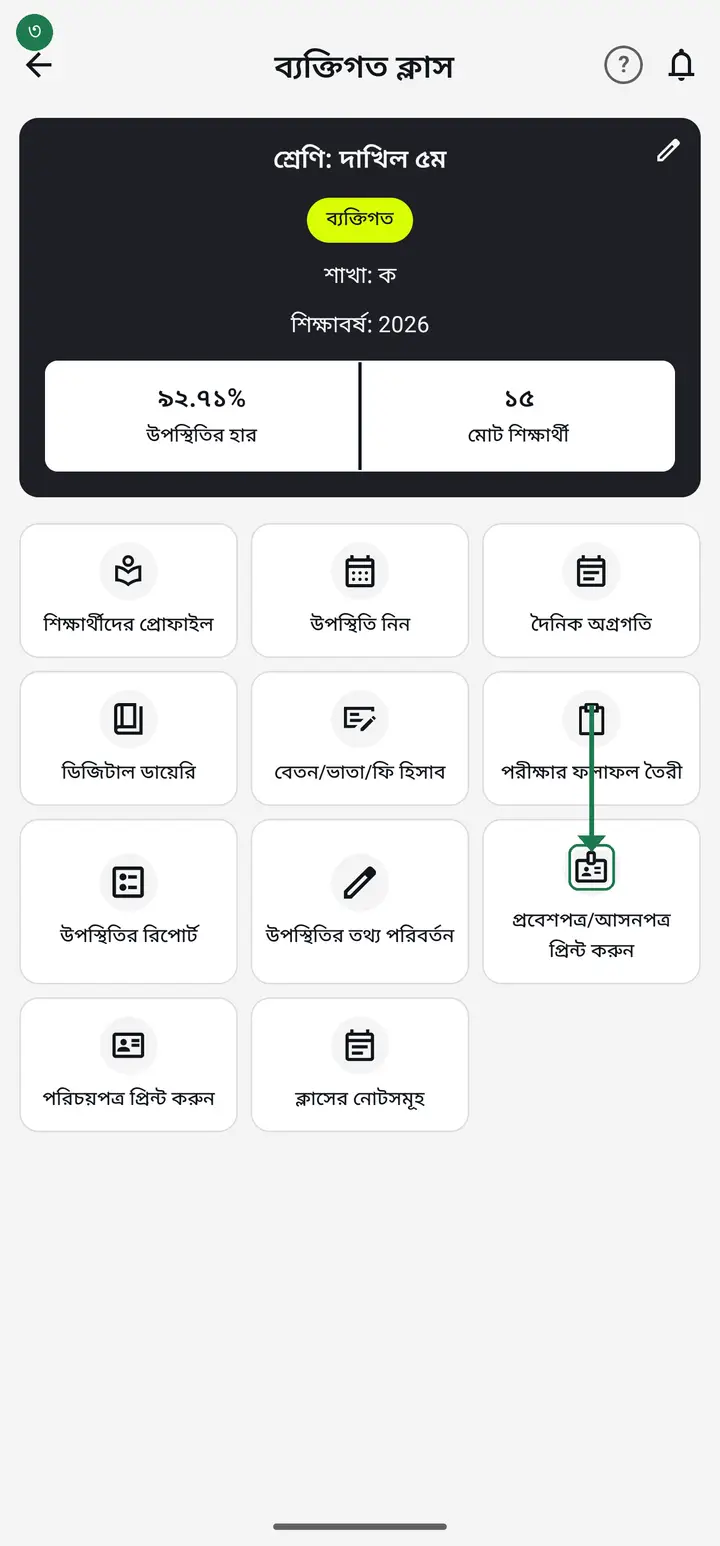
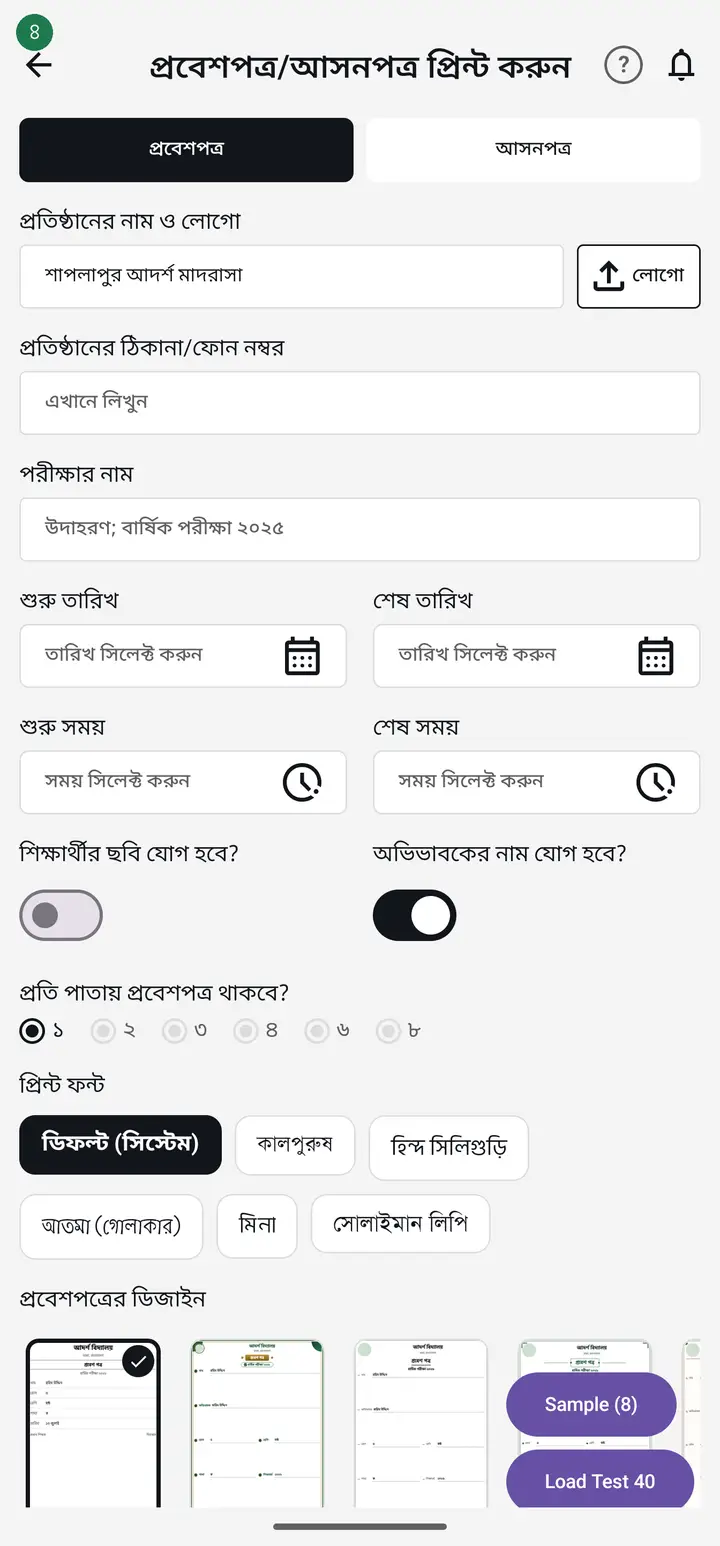
You do not need a separate tile for seat cards — the very top of this same screen has two tabs, "প্রবেশপত্র" (admit card) and "আসনপত্র" (seat card). Tap "আসনপত্র" and everything below stays the same.
-
Type the school name in "প্রতিষ্ঠানের নাম ও লোগো", then tap "লোগো" (Logo) to add and crop the image.
-
Check "প্রতিষ্ঠানের ঠিকানা/ফোন নম্বর" (address/phone) and fill in "পরীক্ষার নাম" (exam name) — for example অর্ধবার্ষিক পরীক্ষা ২০২৬.
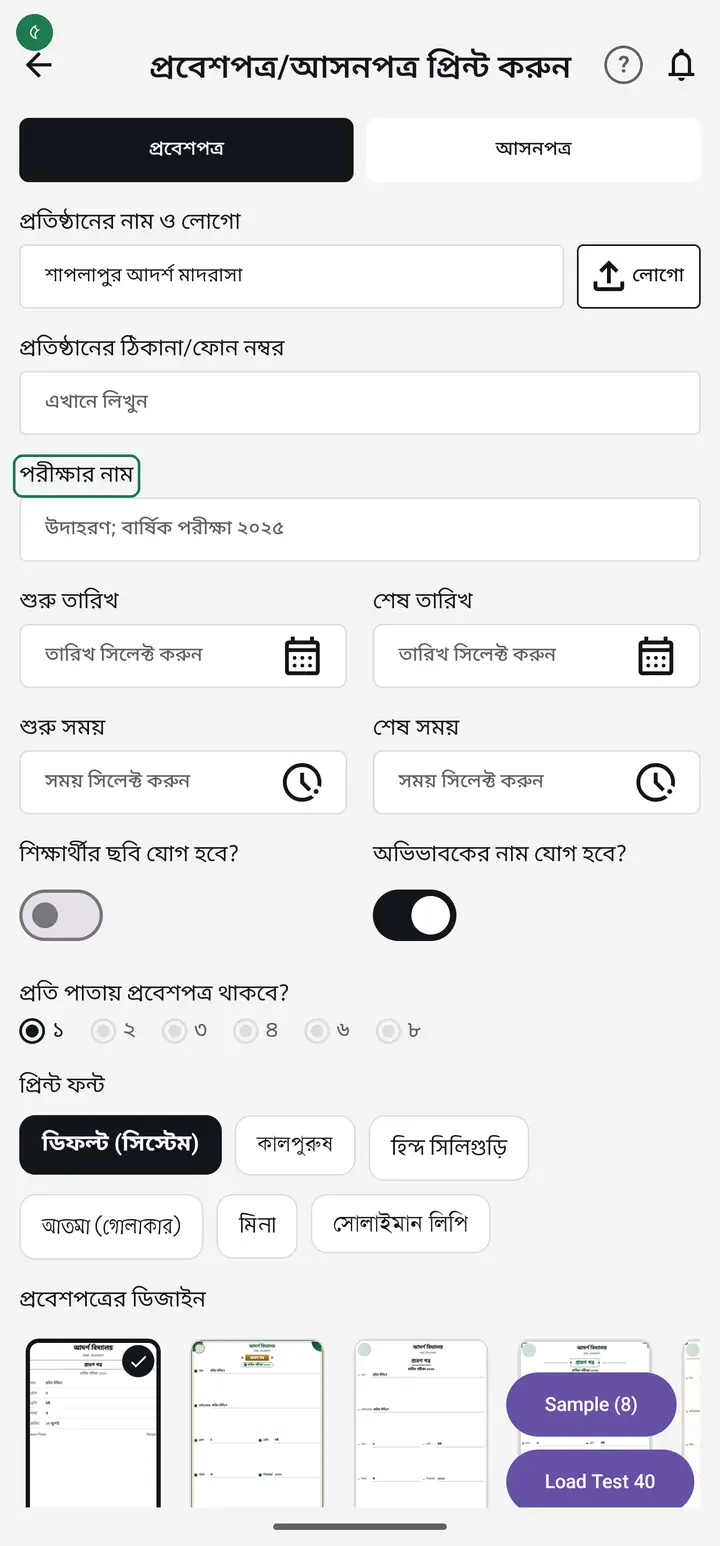
This box behaves in two ways depending on your app version. On the newer build the institution address and phone fill themselves in — provided you saved them once under the institution profile — with the address on one line and "মোবাইল: ..." on the next, because both on one line get clipped on the card. On older builds the box arrives empty and you type it yourself. Either way you can tap the box and change the wording; the app never overwrites what you typed.
-
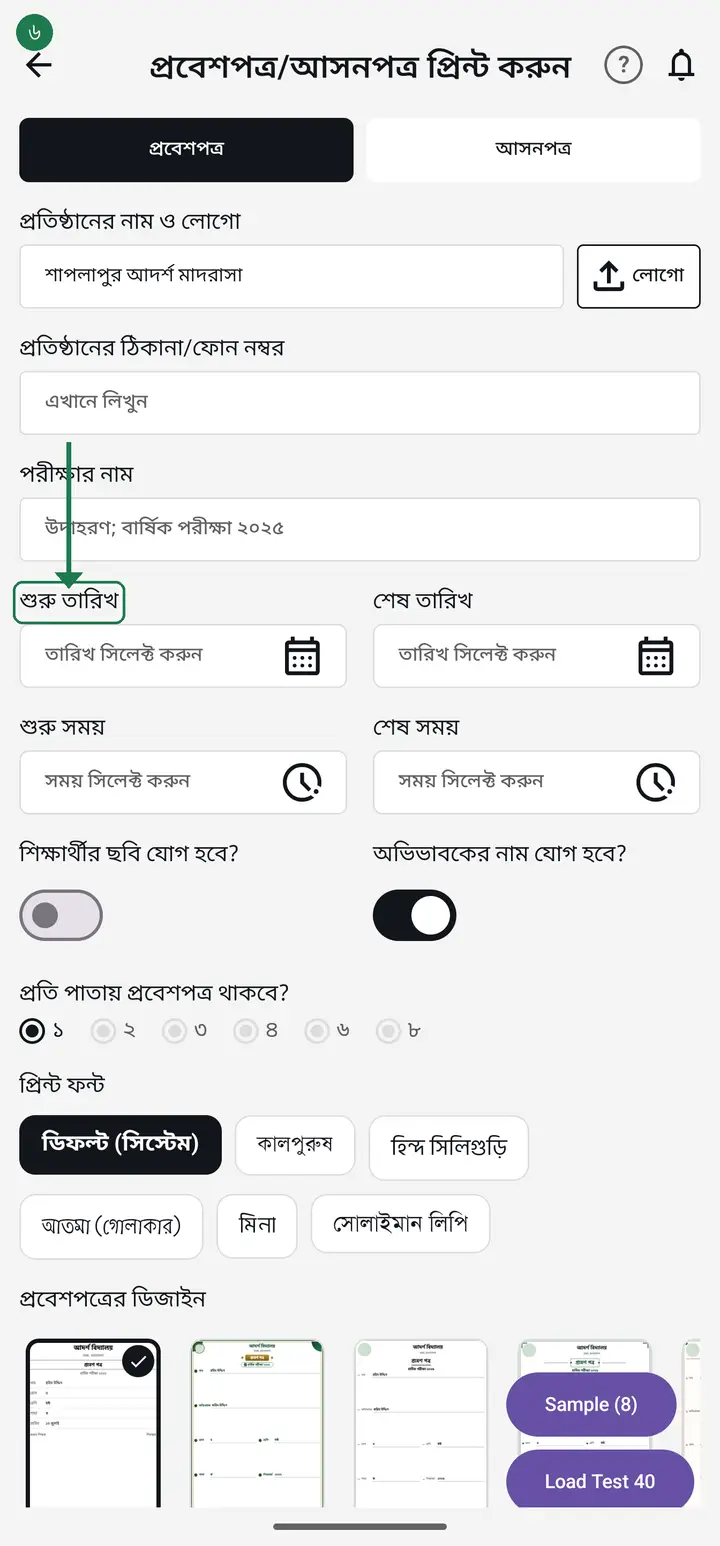
Set "শুরু তারিখ" and "শেষ তারিখ" (start and end date), then "শুরু সময়" and "শেষ সময়" (start and end time).
-
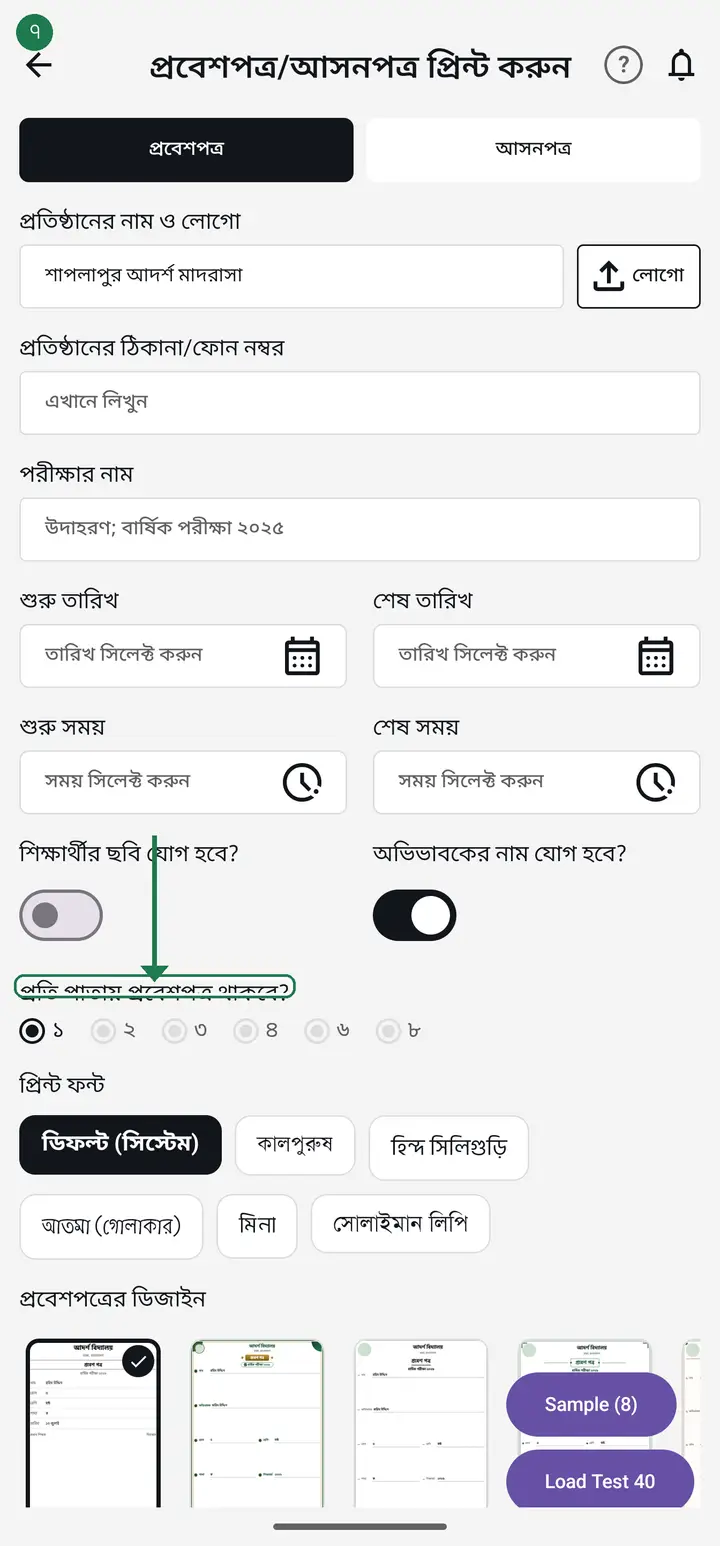
Choose how many cards per sheet in "প্রতি পাতায় প্রবেশপত্র থাকবে?" — 2 or 4 saves paper.
-
Turn on "শিক্ষার্থীর ছবি যোগ হবে?" to include student photos, and the guardian-name switch if you want that too.
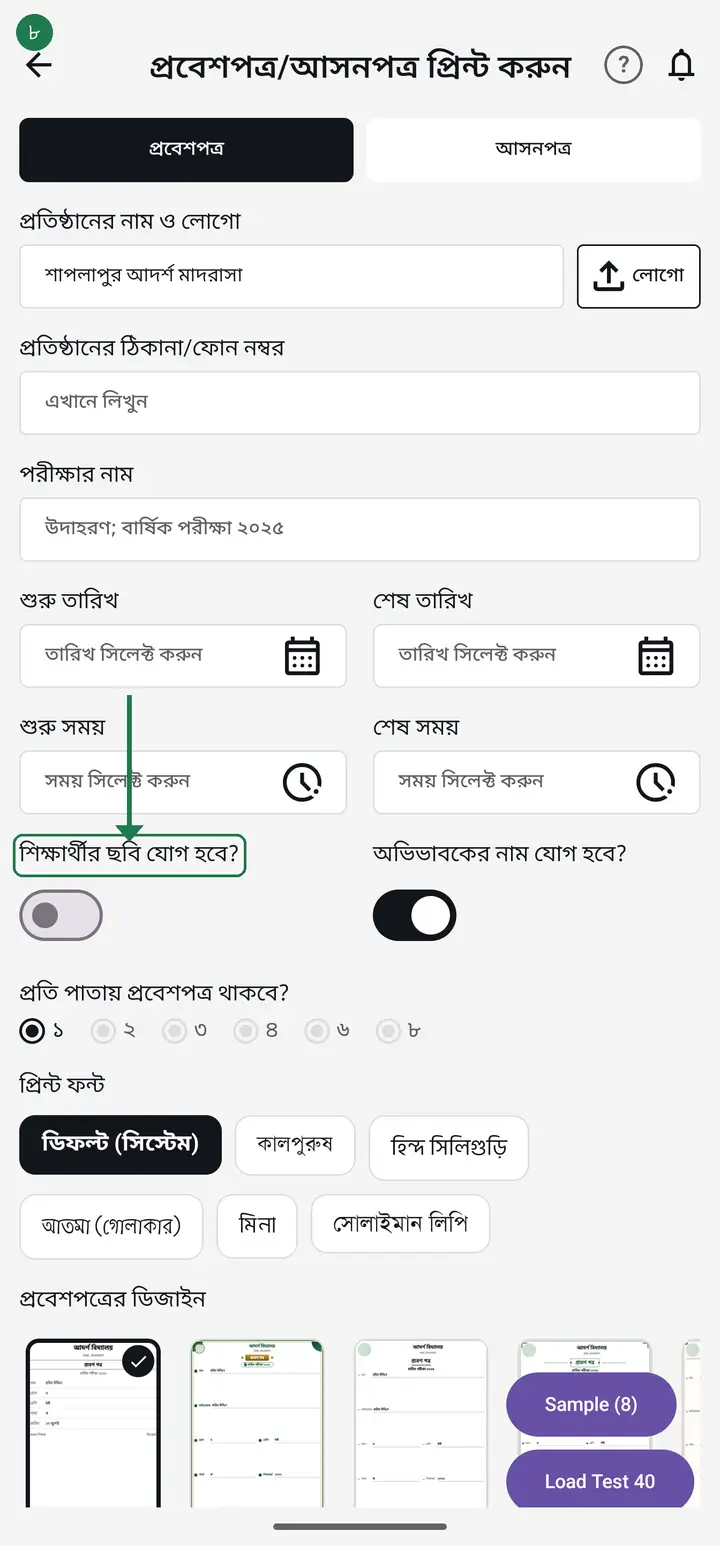
If a student has no photo on their profile, the box prints blank with no warning. Add photos to the profiles first if you want them.
-
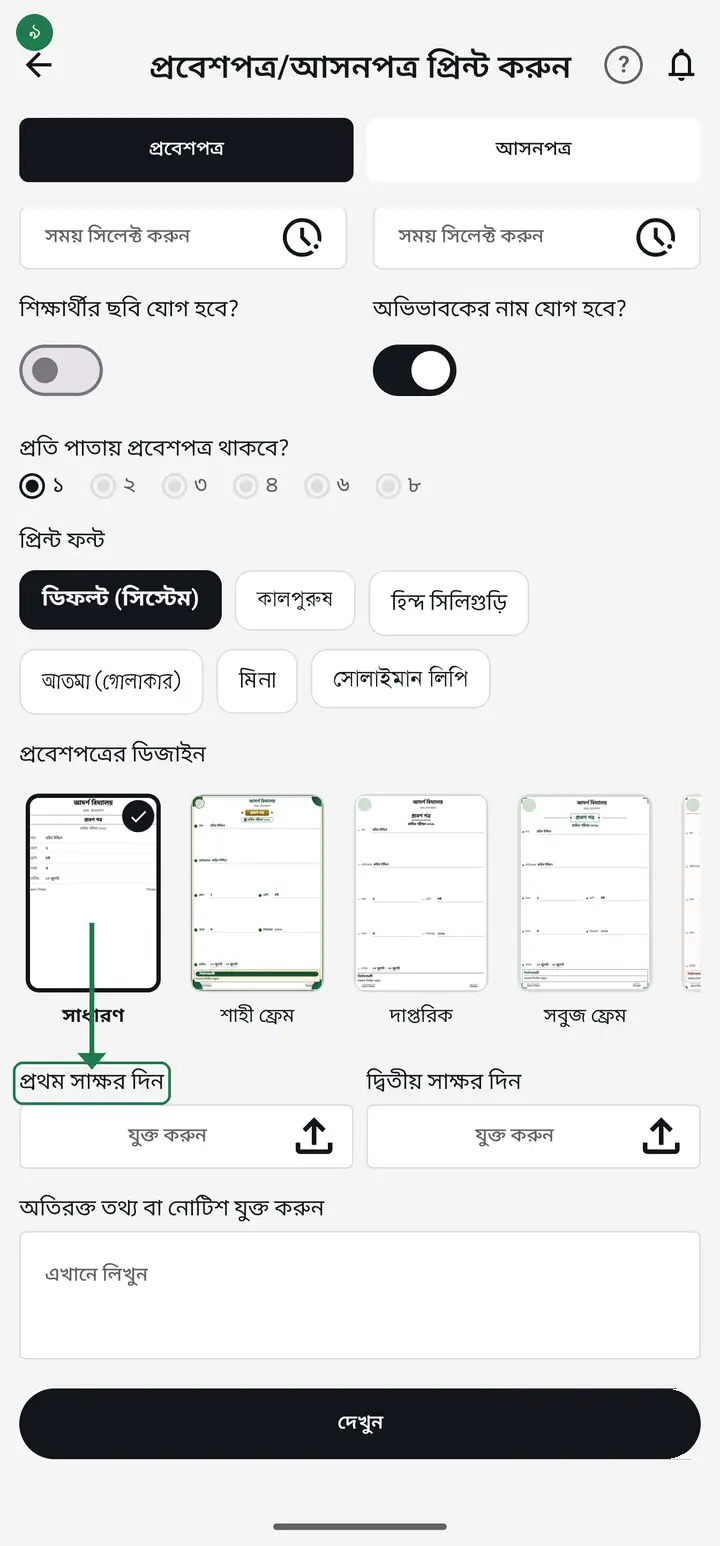
If needed, tap "প্রথম সাক্ষর দিন" (Add first signature) to draw or upload a signature. You can also add an extra notice below.
-
If the text looks small, "লেখার আকার" (Text size) sits right under "প্রিন্ট ফন্ট" — tap "+" to grow it, "−" to shrink. 100% is the original size.
"+" cannot grow the text much, and that is deliberate — past the limit the lower part of the card, including the signature box, prints off the paper with nothing on screen to warn you. When you need bigger text the real lever is the cards-per-sheet number: going from 8 to 2 makes the type roughly four times bigger, far more than "+" ever could.
-
To change the border or frame around the card, scroll just below "লেখার আকার" — six designs with thumbnails: সাধারণ (plain), শাহী ফ্রেম, দাপ্তরিক, সবুজ ফ্রেম, নকশি, আধুনিক. Tap the one you like. "সাধারণ" is the original, and "দাপ্তরিক" is the one with a full black border.
The heading reads two different ways depending on your version. On older builds BOTH tabs say "প্রবেশপত্রের ডিজাইন" (admit card design) — on the আসনপত্র tab that is still the right control, not the wrong one. Newer builds say "আসনপত্রের ডিজাইন" there. Either way the two tabs share ONE design: change it on one and the other changes too, deliberately.
-
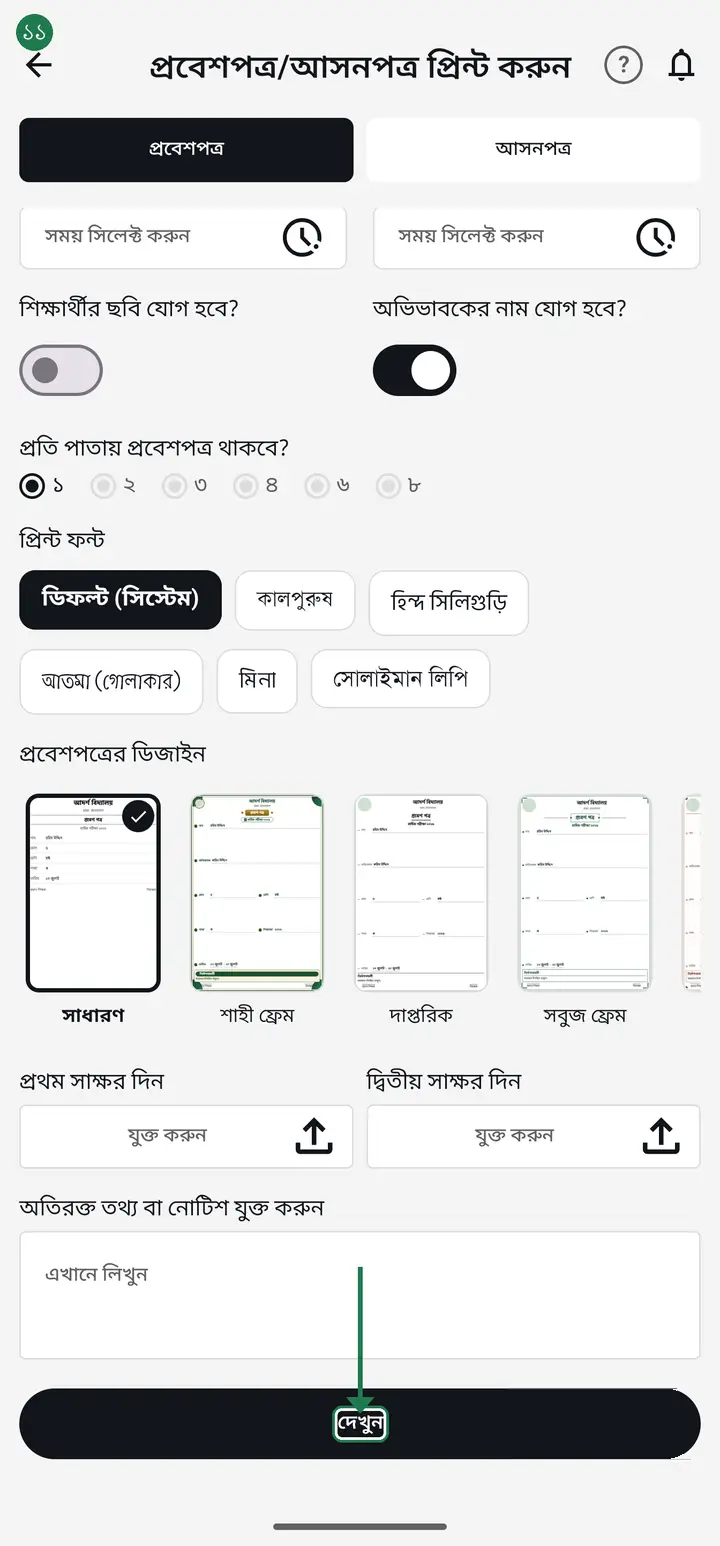
Tap "দেখুন" (View) to preview. "প্রিন্ট ফন্ট" and "লেখার আকার" sit at the top of it — change them there too and the card below repaints immediately. Then tap "প্রিন্ট করুন" (Print) to build the PDF.
Common questions
Can I print admit cards for the whole class at once, or must I do them one by one?
All at once, and that is simply how this screen works — there is no student picker. Open the class, tap "প্রবেশপত্র/আসনপত্র প্রিন্ট করুন", and every student in that class comes out in one PDF. Choose 1, 2, 3, 4, 6 or 8 under "প্রতি পাতায় প্রবেশপত্র থাকবে?" and the app lays them out that many to a sheet — a class of 40 at 4 per page gives you 10 pages. Seat cards work the same way.
The admit card text comes out small — how do I make it bigger?
On the "প্রবেশপত্র/আসনপত্র প্রিন্ট করুন" screen scroll down: "লেখার আকার" (Text size) sits right under "প্রিন্ট ফন্ট", with "−" and "+" beside it. Tap "+" and the percentage grows; tap "দেখুন" (View) and the same control is at the top there, with the card repainting below it. The setting is remembered. But "+" is not where the big difference comes from — "প্রতি পাতায় প্রবেশপত্র থাকবে?" is. Going from 8 per sheet to 2 makes the type roughly four times bigger. Lower that first, then use "+" if you still want more. Before app version 3.2.171 this control lived only inside the preview, far below the card, which is why it was hard to find — update the app.
Why does "+" stop making it bigger?
Because the card is full at that point. Growing the type further would push the lower rows — the dates, the times, the signature boxes — off the paper, and you would not find out until it printed. So each layout has its own limit and the app says so under the control. For bigger text the lever is not "+" but "প্রতি পাতায় প্রবেশপত্র থাকবে?": 8 → 4 → 2 → 1 grows the type far more. (Older versions let "+" go higher, but that extra never actually fit — 190% at 1 per sheet printed the signature box off the sheet. Newer versions make the DEFAULT type bigger instead, so you get larger text without touching "+".)
Can I change the border on the admit/seat card — a colour down two sides, or a full black border?
You can change the border, but you cannot pick the colour yourself. On the "প্রবেশপত্র/আসনপত্র প্রিন্ট করুন" screen, just below "লেখার আকার", six designs are laid out with thumbnails — most people miss it because it sits low on the screen. "দাপ্তরিক" gives a plain black border all the way round; "শাহী ফ্রেম" is green and gold, "সবুজ ফ্রেম" green, "নকশি" maroon, "আধুনিক" blue. There is no yellow design today and no free colour picker — ask in the support group if you want one added.
Where do I choose which students get admit cards?
You do not choose — it makes cards for all students of the class you entered from. So check you came in from the right class.
I get a message about print quality on a big class.
With many students at once the image quality drops, and the app tells you. For clean prints, split into the batch size it suggests.
The PDF is not being created.
Try once more. If it keeps failing, check the app has storage permission and that the class actually has students in it.
Do I need internet?
Filling the form and making the PDF work offline. Internet may be needed only to fetch student photos.
No Saturday date appears in the date picker. Is a holiday setting causing it?
No — holidays have nothing to do with it, and nothing needs changing in settings. The calendar is seven columns, Sunday to Saturday. On a small screen, or when Display size / font size is turned up, the last column falls outside the visible area — and the last column is Saturday. The dates are there, they just cannot be seen or tapped. To work around it now, lower Settings → Display → Display size (or font size) and pick the date again. This is fixed in the newer app version.
Ask AI about this page
Ask an AI app to explain this page in simple language.
Copied — now paste it
Get Hazira Khata free on Google Play
More tutorials
- How to collect fees Create the month's fee once, then record what each student pays. The app works out who still owes what.
- When students pay different amounts One student pays 1000, another 2000, another nothing — each can have their own amount. Old dues are recorded the same way.
- Previous dues — recording old arrears and carrying them forward Enter the dues students carried in from before you started using the app, and let each month's unpaid balance carry into the next month by itself.
- How to make a marksheet Create a subject's mark form, enter the marks, then print the whole class's marksheet.
- Getting every student's result in one go The whole class's results in one PDF in one tap — one page per student, so you never export them one at a time. Print it, or keep it in your own Google Drive and find any student by name years later.
- How to make student ID cards Make and print student ID cards yourself — with your logo and their photos.
- How to make staff ID cards Print ID cards for teachers, office staff, guards and support staff — all on one sheet.
- Importing attendance from a machine Take the file off your fingerprint machine and load it into the app — the attendance fills itself in.