
Keeping the income and expense book
Where the institution's money came from and where it went — all in one book.
The screenshots show the app in Bangla, its main language. The buttons sit in the same places in English.
-
Tap the "আয়-ব্যয়" (Income-expense) tab at the top of the home page.
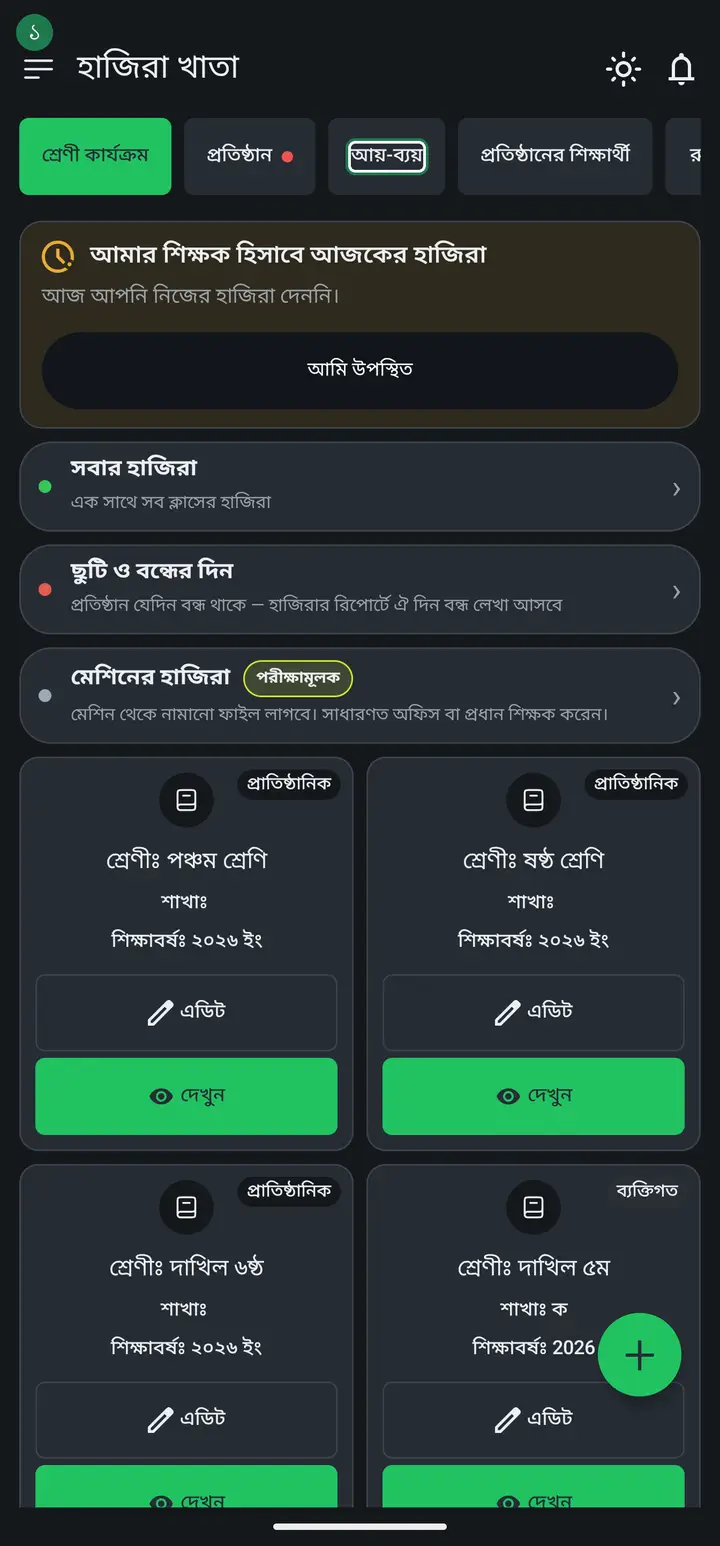
-
The book opens. From here you can add a new income or expense entry.
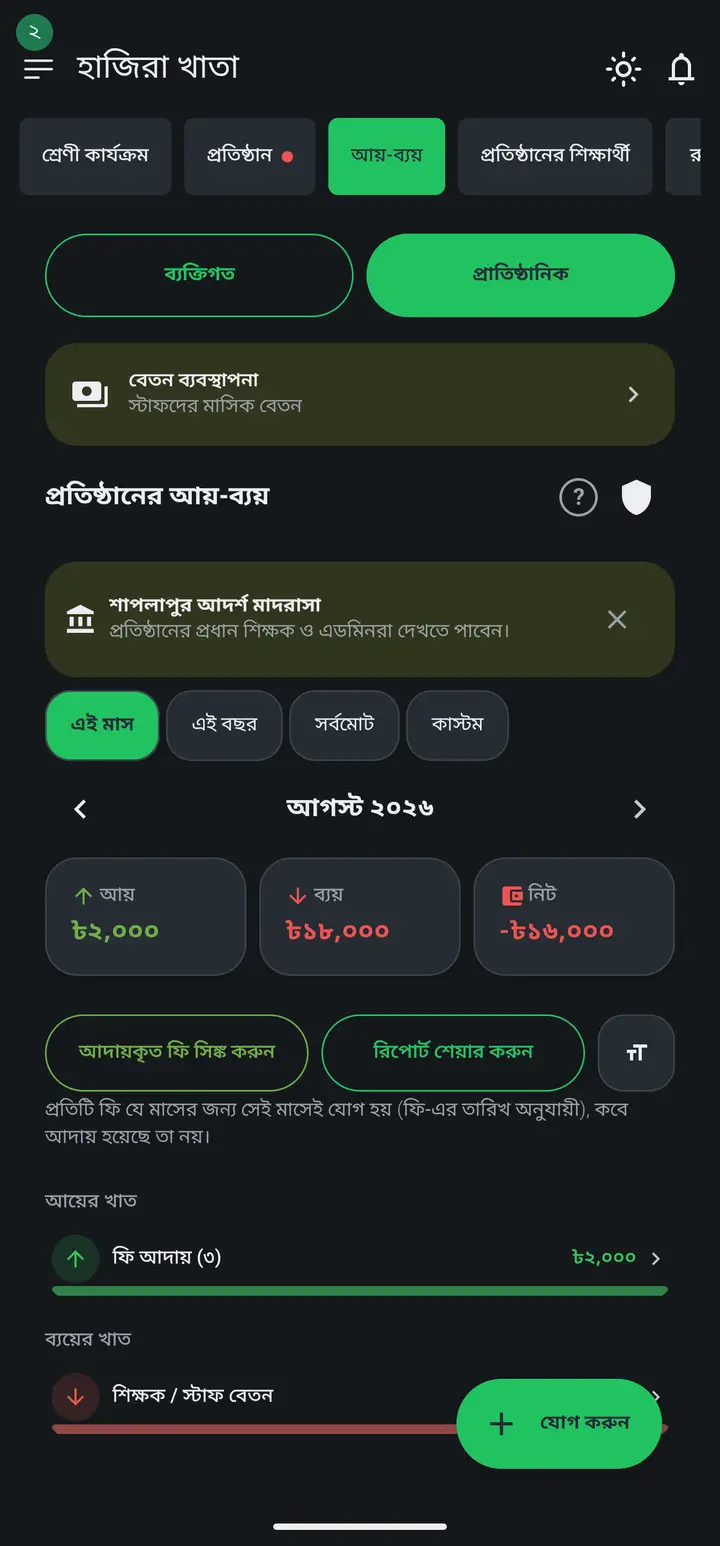
Every money entry records who wrote it and when, so it can be checked later.
-
Tap the green "যোগ করুন" (Add) at the bottom and the new-transaction page opens. Pick আয় (income) or ব্যয় (expense) at the top, type the figure in "পরিমাণ" (Amount), pick one of the categories below, then tap "সংরক্ষণ করুন" (Save).
-
When you have several expenses from the same day to write in a row, do not close and reopen the page each time. Right under "সংরক্ষণ করুন" there is "সেভ করে আরেকটি যোগ করুন" (Save and add another) — it files the entry and keeps the page open. Only the amount and the note are cleared; income/expense, the category and the date stay as they were, so the next one takes only a figure.
This has been there since 3.2.195 and has reached everyone. If you cannot see the button your app is an old build — update from the Play Store; until you do, tap "যোগ করুন" again after each entry — the result is identical, it just takes longer.
Common questions
Is there no way to add several transactions at once?
There is — "সেভ করে আরেকটি যোগ করুন" (Save and add another), just under "সংরক্ষণ করুন" on the new-transaction page (it shows only while creating, not while editing an existing entry). Each tap files the entry and keeps the page open, clearing just the amount and the note. For writing up ten expenses from one day it is by far the fastest route.
"ব্যক্তিগত" or "প্রাতিষ্ঠানিক" — which one should I write in?
There are two buttons at the top, and whichever is selected is named on the new-transaction page itself. "ব্যক্তিগত হিসাবে যোগ হবে — শুধু আপনি দেখবেন" means your own private book, invisible to the institution. "প্রাতিষ্ঠানিক হিসাবে যোগ হবে — এডমিনরা দেখবেন" means the institution's book. Writing a school expense into the personal book by mistake is the most common error here, so read that line once before typing the figure.
When a student pays a class fee, does that get added to the income-expense book by itself?
Yes — it is added by itself, nothing needs to be typed twice. When a payment is recorded against a fee inside a class's "বেতন/ভাতা/ফি হিসাব" (fee collection), that money lands in the "আয়-ব্যয়" (income-expense) book as income under "ফি আদায়" (fee collected) by itself — the moment you open the "আয়-ব্যয়" tab, no button needed. There is also a manual "আদায়কৃত ফি সিঙ্ক করুন" (Sync collected fees) button if you would rather trigger a check by hand. A fee is booked to the month it is FOR, not the date the cash was actually taken. Syncing twice never adds the money twice. Tapping the "ফি আদায়" line in the income list opens the full list of every fee collected across the institution — but it cannot be edited or deleted from here, go to the fee's own screen in the class to change it. (This is about STUDENTS' class fees — "বেতন ব্যবস্থাপনা" inside আয়-ব্যয় is a separate thing, that is STAFF salary, and this sync does not touch it.)
How do I tell whose salary a row in the expense list belongs to?
From 3.2.225 the payee's name appears under the salary row. Before that it did not: the row showed only "শিক্ষক / স্টাফ বেতন" and the amount, and the name underneath was whoever TYPED the entry, not who was paid — which led people to think the head teacher had taken the money himself. Now the payee is named, and the author is prefixed with "লিখেছেন". Older rows cannot be filled in retrospectively; new ones will carry the name. To match an old row to a person, open বেতন ব্যবস্থাপনা for that month.
If several teachers keep the income-expense book, can you tell who wrote which entry — or does no name show at all?
In the institution book you can. Under each line, next to the date, sits the name of whoever wrote that entry — "12 August • Abdul Karim". With three teachers writing you get three different names, and one teacher's entry never appears under another's. The name is stored with the entry itself, so renaming a person or a category later does not rewrite what that line already said. The personal book shows no name — it is your own book, there is nobody else it could be. One thing to watch: if the name is missing on a line, that teacher has no name set on their profile. Signing in with a phone number gives the app no name, so it has to be typed in once — left menu → প্রোফাইল (Profile) → type the name → save. Their entries from then on carry it; the ones already filed without a name do not get one added back.
I typed a transaction by mistake — how do I delete it?
Tap once on the wrong line itself. The transaction opens again, and at the very bottom there is a "মুছে ফেলুন" (Delete) button. It asks to confirm, and you can type a reason if you want. To remove several at once, press and hold your finger on any one line — a tick box appears beside every line, tick the ones you want and tap the delete button at the bottom. The money leaves the totals, but who removed it, when and why stays in the history, so anything that does not add up later can still be traced.
Why does nothing to delete appear when I tap or press-and-hold a "শিক্ষক / স্টাফ বেতন" line?
Because those lines do not belong to the income-expense book — they are a shadow of the "বেতন ব্যবস্থাপনা" (Payroll) screen and only show what is written there. So they cannot be edited or deleted here. The line carries a small padlock, and above the list it says "এই এন্ট্রিগুলো বেতন ব্যবস্থাপনা থেকে স্বয়ংক্রিয়ভাবে আসে…" with a "বেতন স্ক্রিনে যান" (Go to the salary screen) button right under it — that button is the shortest way there. On the payroll screen, tap the red bin icon at the right of the staff member whose salary is wrong; removing it there corrects this income-expense line by itself. The fee-collected lines work the same way — those are changed from the fee screen inside the class.
Ask AI about this page
Ask an AI app to explain this page in simple language.
Copied — now paste it
Get Hazira Khata free on Google Play
More tutorials
- How to collect fees Create the month's fee once, then record what each student pays. The app works out who still owes what.
- When students pay different amounts One student pays 1000, another 2000, another nothing — each can have their own amount. Old dues are recorded the same way.
- Previous dues — recording old arrears and carrying them forward Enter the dues students carried in from before you started using the app, and let each month's unpaid balance carry into the next month by itself.
- How to make a marksheet Create a subject's mark form, enter the marks, then print the whole class's marksheet.
- Getting every student's result in one go The whole class's results in one PDF in one tap — one page per student, so you never export them one at a time. Print it, or keep it in your own Google Drive and find any student by name years later.
- How to make admit cards and seat cards Make and print exam admit cards and seat cards yourself — with the logo, signatures and dates. Both live on one screen, as two tabs at the top.
- How to make student ID cards Make and print student ID cards yourself — with your logo and their photos.
- How to make staff ID cards Print ID cards for teachers, office staff, guards and support staff — all on one sheet.