
Making a question paper
Write the exam questions in the app and print them on your institution's letterhead. You never type the full marks — the marks on the questions add themselves up.
The screenshots show the app in Bangla, its main language. The buttons sit in the same places in English.
-
From the home page, tap the card of the class sitting the exam. Among the tiles inside you will find "প্রশ্নপত্র" (Question paper), right beside প্রত্যয়ন পত্র and বিজ্ঞপ্তি. Tap it.
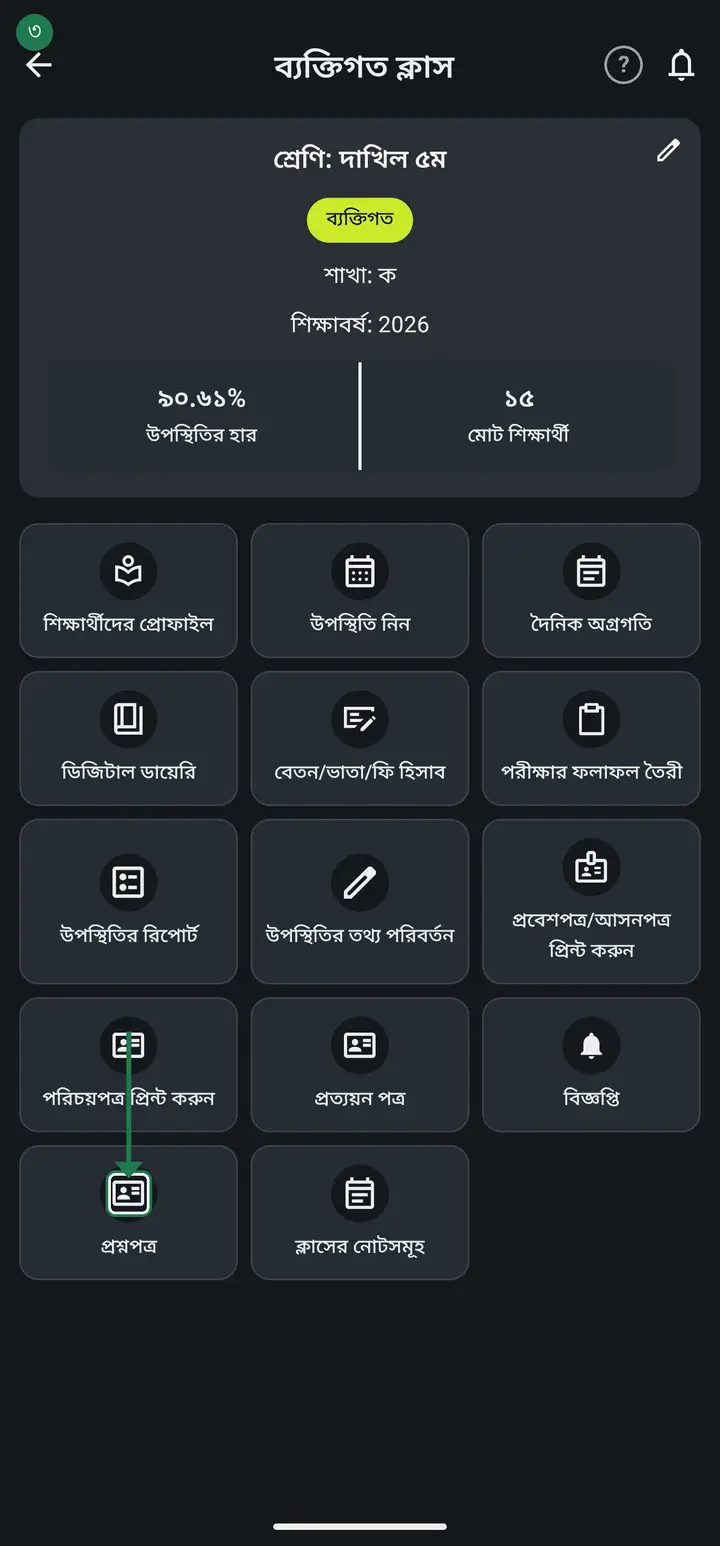
The tile sits with the printed documents, not with the exam routine. The routine lives on its own tab — that one is which exam falls on which day, this one is what the questions are.
-
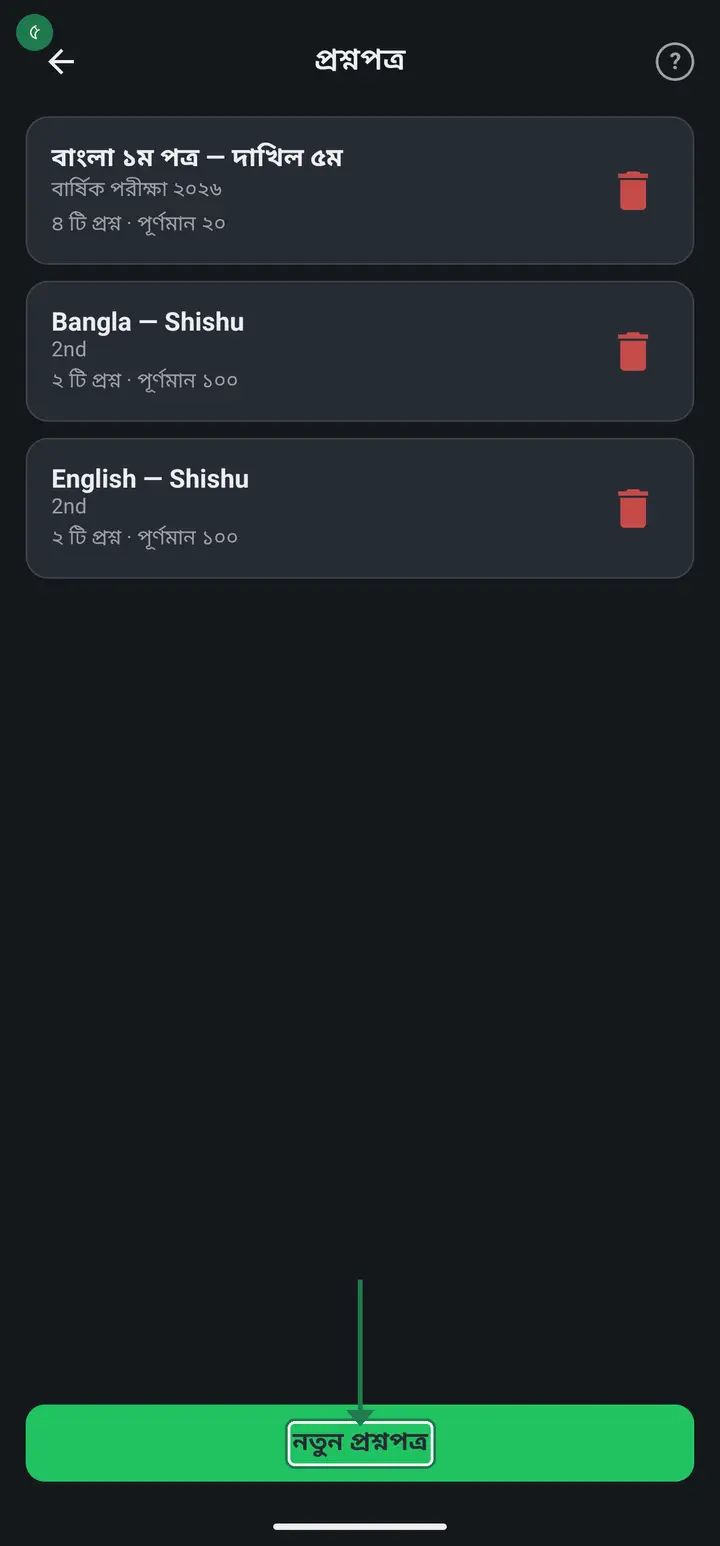
The first time, the list is empty. Tap "নতুন প্রশ্নপত্র" (New question paper).
-
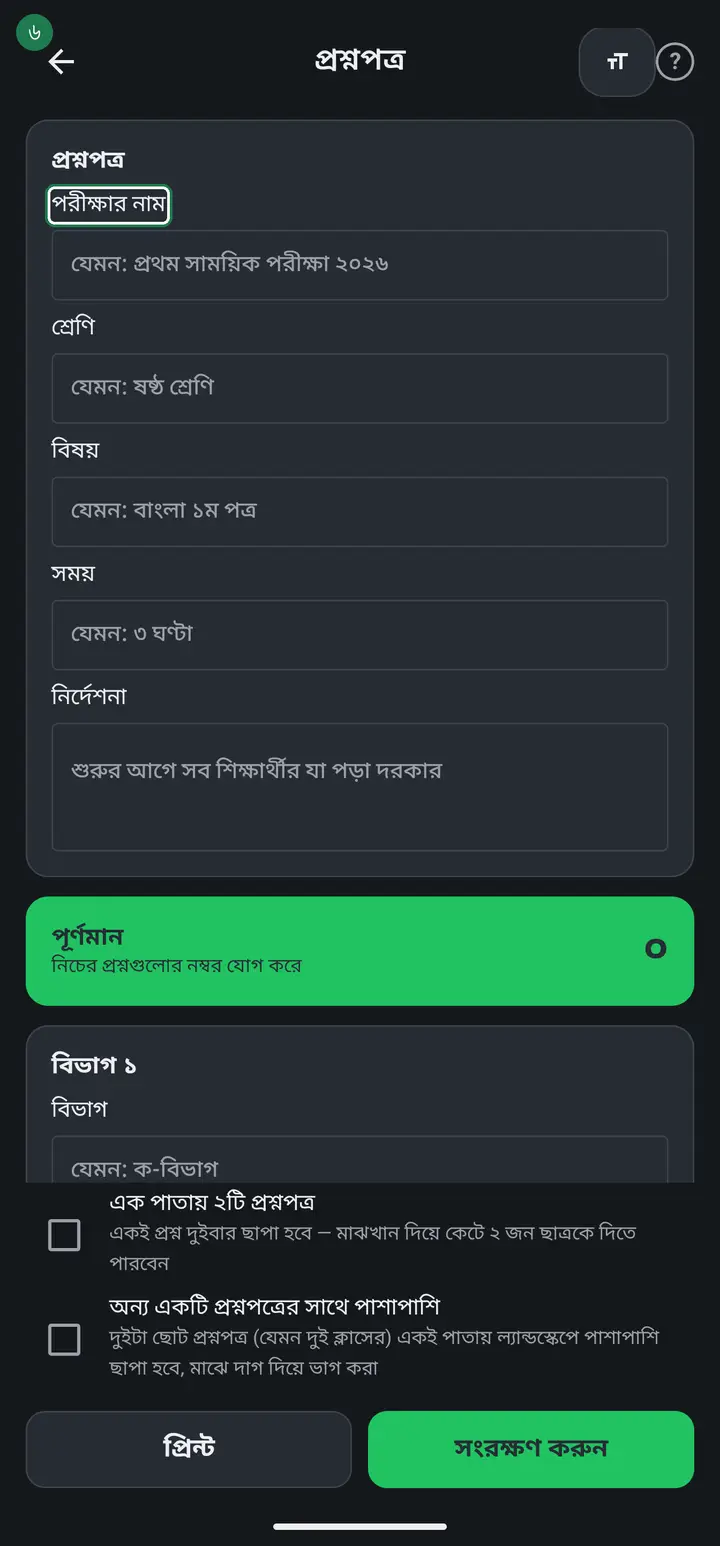
Fill in the boxes at the top — exam name, class, subject and time. These print at the head of the paper. The institution name, its English name, the address and the logo are filled in by the app; you do not type them.
-
Just below it, on the green strip, you will see "পূর্ণমান" (Full marks) with a small line under it saying "নিচের প্রশ্নগুলোর নম্বর যোগ করে" (added up from the questions below). It is not a box you type in. As you add questions the number moves by itself.
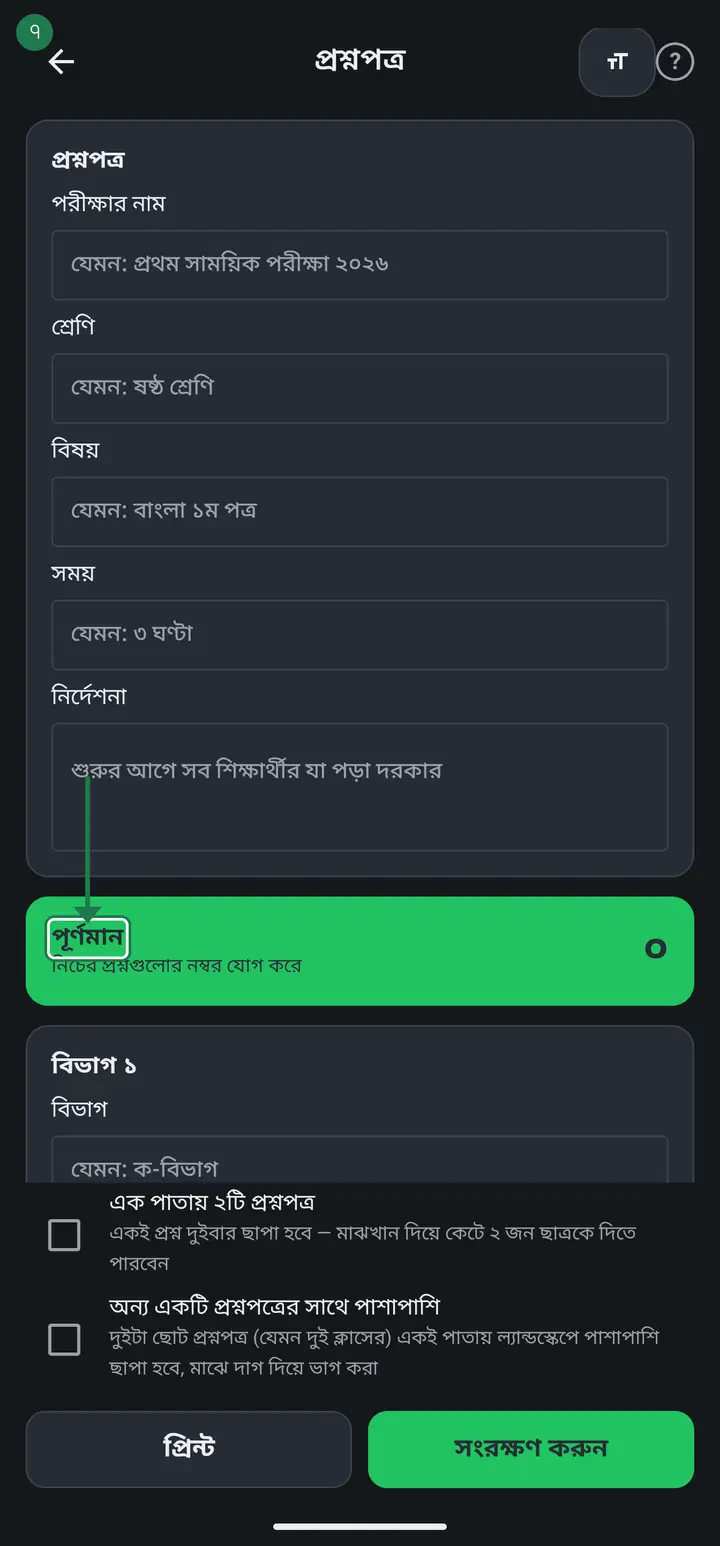
The full-marks box is left out on purpose. A hand-typed total drifting away from the questions is the single most common mistake — a teacher changes one question's marks and forgets the total at the top. To change the total, change a question's marks.
-
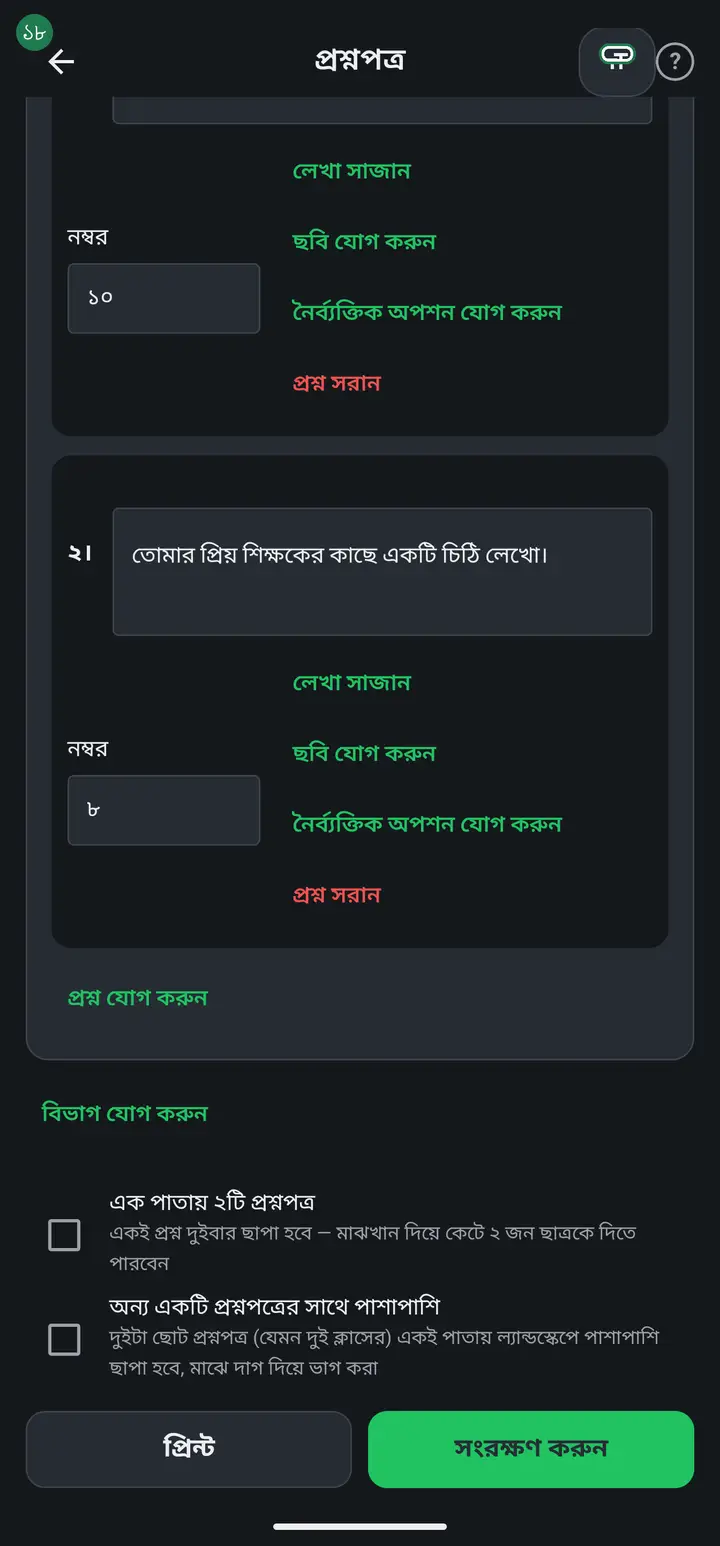
Tap "প্রশ্ন যোগ করুন" (Add question), write the question, and put its marks in the small box beside it. For a written, creative or short question that is all there is to do.
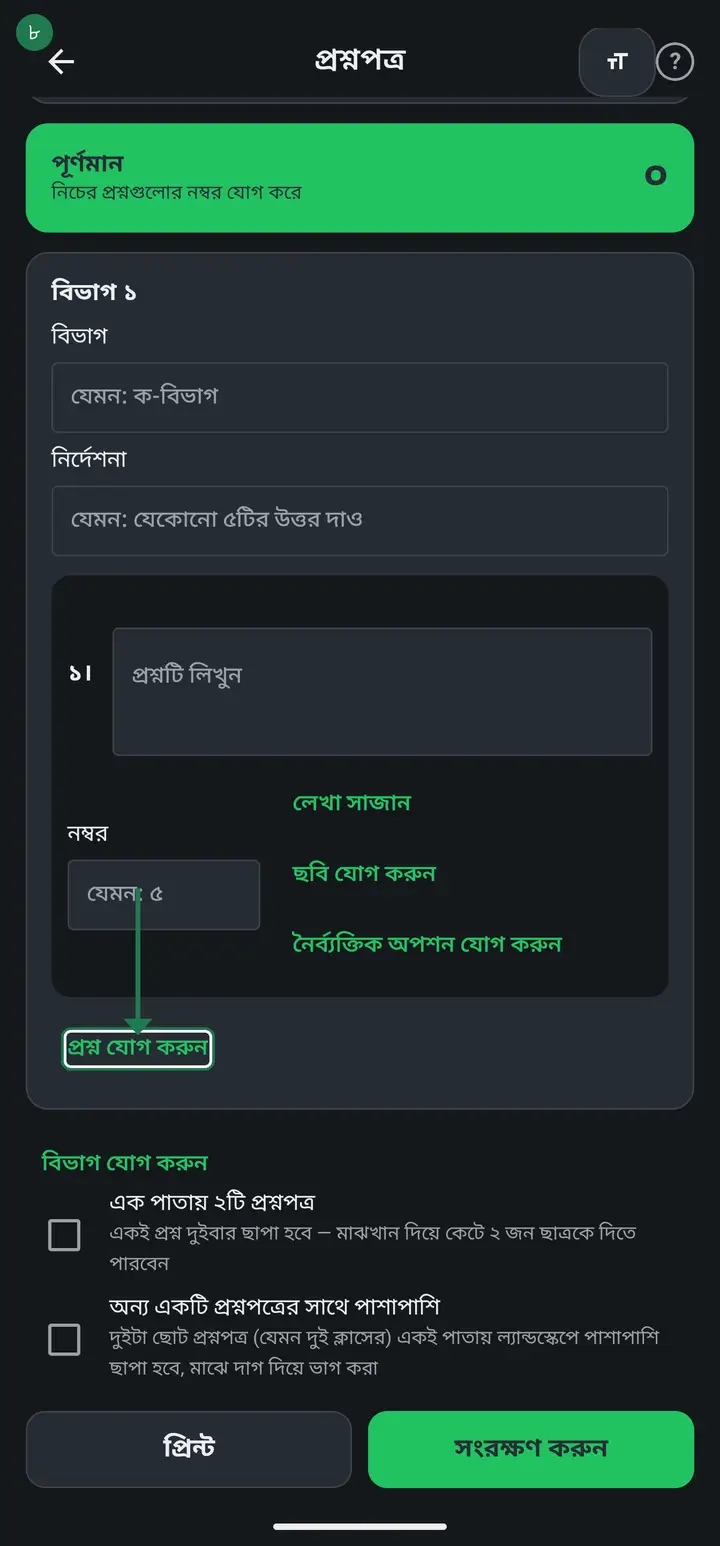
Leaving the marks box empty prints nothing beside that question and counts nothing in the total. If you deliberately want an unweighted question, that is the correct behaviour.
-
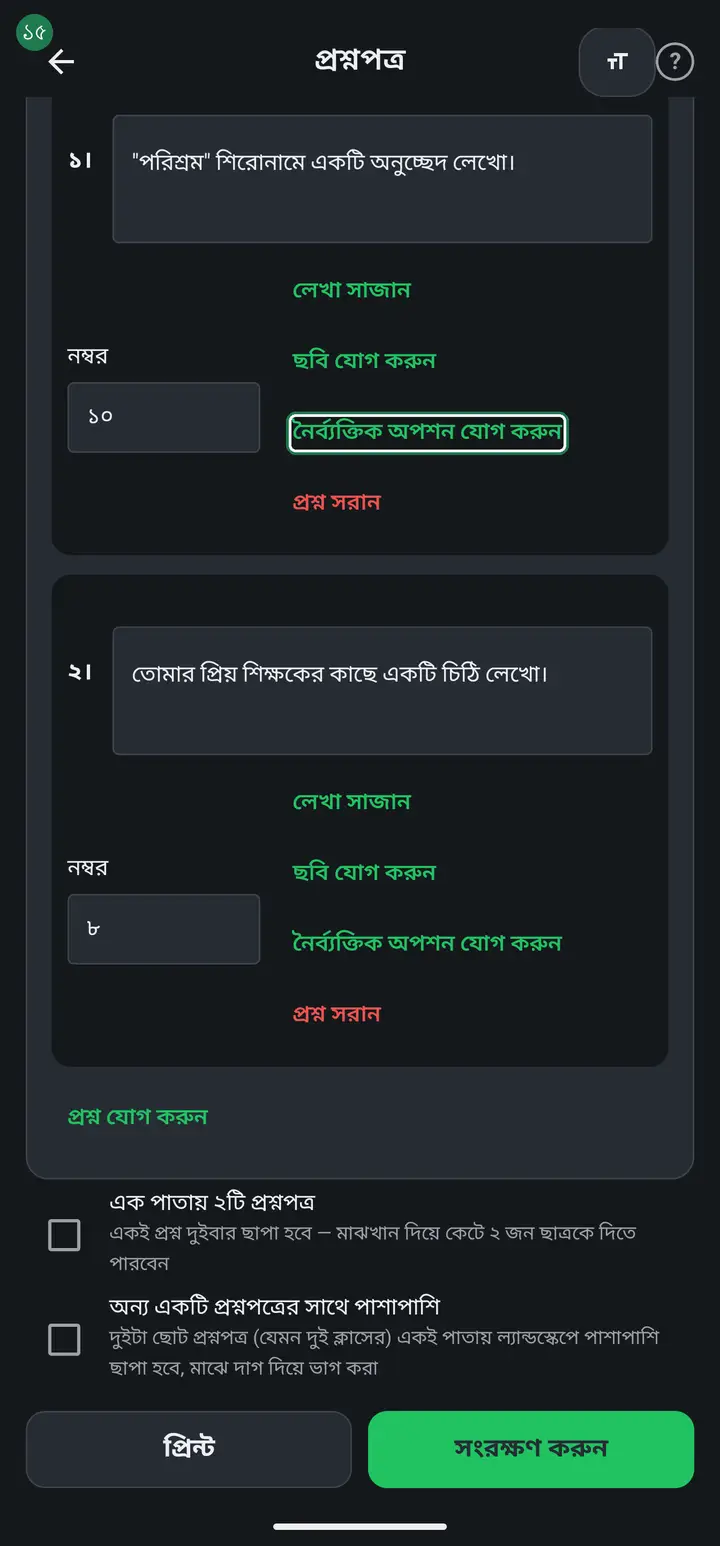
For a multiple-choice question, tap "নৈর্ব্যক্তিক অপশন যোগ করুন" (Add multiple choice) under it. Four boxes appear — ক, খ, গ, ঘ. Tap "অপশন যোগ করুন" (Add choice) for more.
-
You can attach a picture to a question — a map, a diagram, a photo of part of a book. It prints under the question and above the choices.
-
Text can be bold, italic or underlined. If your questions are already typed somewhere else, you can copy and paste them in.
-
To split the paper into "ক-বিভাগ", "খ-বিভাগ" and so on, tap "বিভাগ যোগ করুন" (Add section). Each section gets its own name and its own instruction — "যেকোনো ৫টির উত্তর দাও" for example. The instruction prints in brackets under the section name.
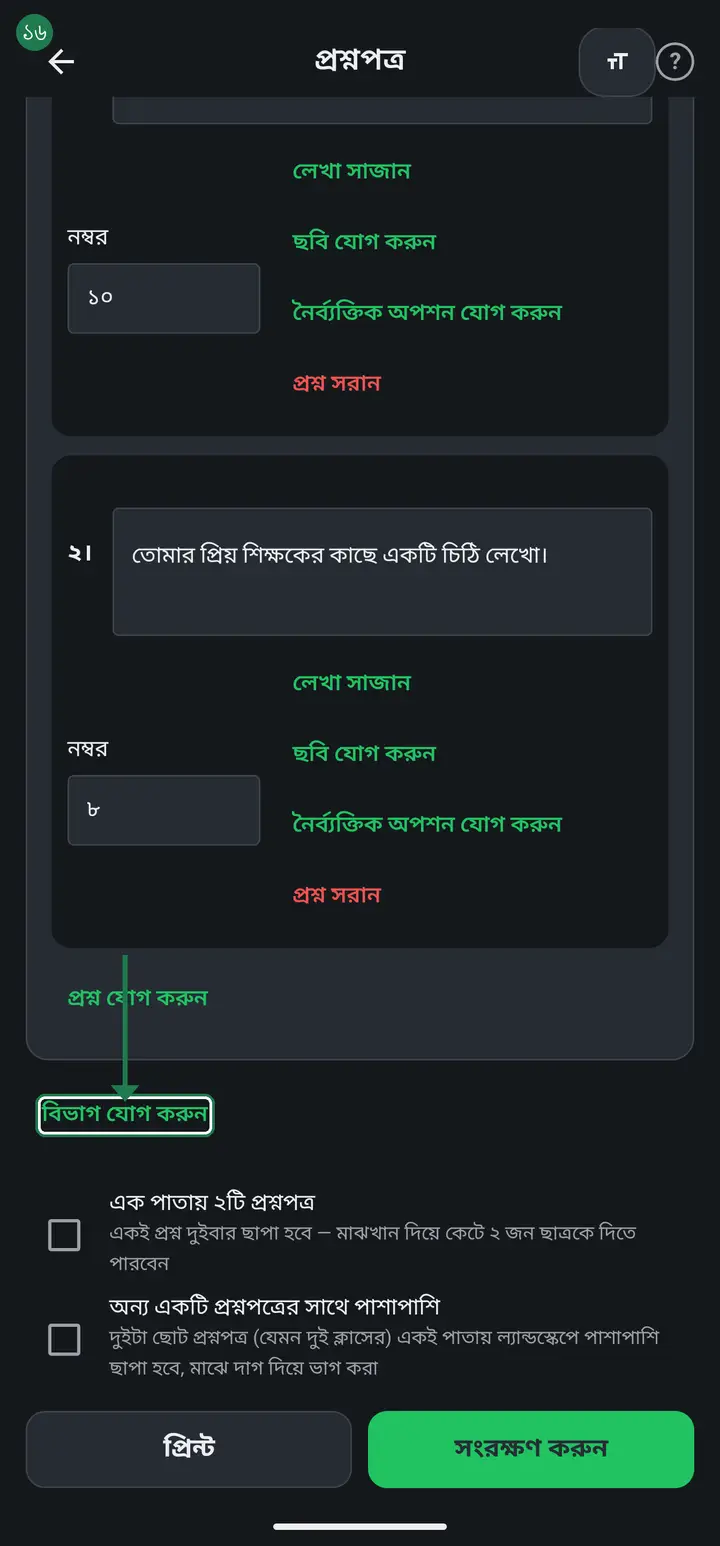
Question numbers run continuously across sections. If ক-বিভাগ ends at 5, খ-বিভাগ starts at 6, not back at 1. That is deliberate — so that "question three" means exactly one question in the exam hall.
-
If you do not need sections, do nothing. Leave the section name empty and the paper prints as a single numbered list of questions.
-
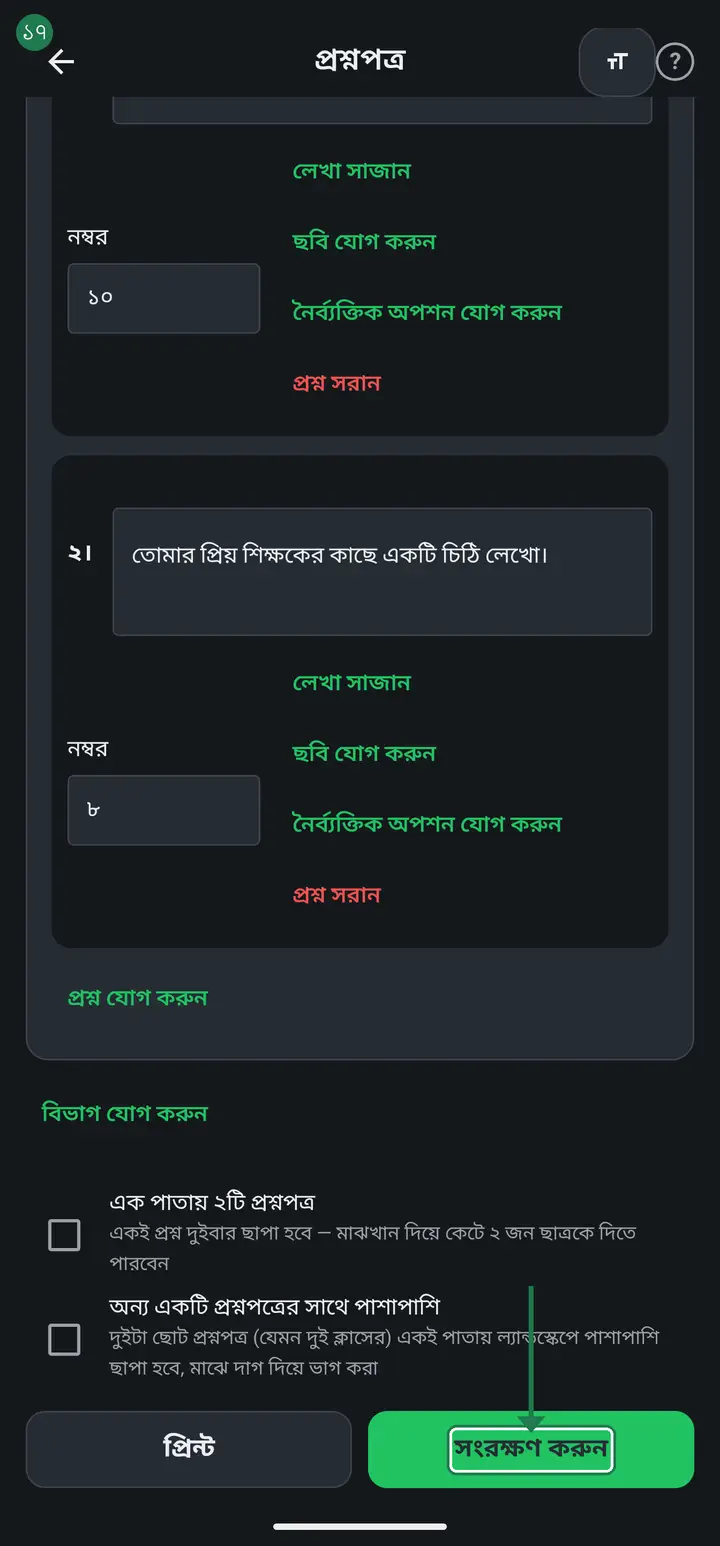
When you are done, tap "সংরক্ষণ করুন" (Save) at the bottom. "প্রশ্নপত্র সংরক্ষণ হয়েছে" confirms it. Then tap "প্রিন্ট" beside it and the PDF is made and opened.
-
If the print is too small or too large, tap the letter-size icon at the top right. From there you can size the whole sheet up or down — institution name, questions and marks all together.
This size is remembered for the question paper only. It does not change your receipts or admit cards.
Common questions
Where is the box for full marks? I cannot find it.
There is none, on purpose. The number on the green strip IS the full marks, and it is made by adding up the marks on the questions below. To get 100, set the question marks so they add to 100. This way the total at the head of the paper can never disagree with the marks inside it.
The total is lower than my own count. Why?
A question with nothing written in it is neither printed nor counted — even if it has marks on it. Scroll through and check whether one was left empty.
One question is worth 2+3. How do I enter that?
Put 5 in the marks box and keep the parts inside the question text — "(a) … 2 (b) … 3". "2+3" in the marks box cannot be added to a total, and then the full marks at the top would have to be typed by hand again.
Can I give half marks (2.5)?
Yes. Type 2.5 in the marks box. It counts correctly in the total and prints as ২.৫. A whole number never prints its decimal — 5 prints as ৫, not ৫.০.
Can I write a question paper with no internet?
Yes. Writing, saving and printing all work offline, and the paper uploads by itself when you are back online — you do nothing. Only attaching a picture to a question needs a connection.
I want to build a new paper from an old one. Do I have to retype it?
Opening the old one from the list, editing it and saving changes THAT paper. To keep both, open "নতুন প্রশ্নপত্র" and copy-paste the text across from the old one.
Can other teachers or guardians see the question paper?
No. A question paper stays with you alone — no other teacher and no guardian can see it. There is no way for it to leak before the exam. Only the printed sheet or the PDF you hand over yourself goes anywhere.
A Nursery or Play question needs a grid or boxes (matching, fill-in-the-box). I do not see a table option.
You are right — the in-question table is not switched on yet, so you will not find it. But there is a way that works today: draw the grid on paper or make it anywhere else, photograph it, then tap "ছবি যোগ করুন" (Add image) under that question and put the picture in. It prints with the question exactly as you placed it. Many teachers already do matching-type questions for the lower classes this way.
The institution name looks too small on the printed sheet.
Tap the letter-size icon at the top right and increase the size. The whole sheet grows together — name, address, questions and marks in one proportion.
Ask AI about this page
Ask an AI app to explain this page in simple language.
Copied — now paste it
Get Hazira Khata free on Google Play
More tutorials
- How to sign in Signing in for the first time with your phone number. No email or password needed.
- Add a second way to sign in to one account Add Gmail to an account created with a phone number. It stays one account and nothing inside it changes.
- How to mark your own attendance As a teacher you can record your own daily attendance — it takes one tap.
- Check your salary and sign "received" When your school records your salary, the app tells you. Check the receipt and tap "বেতন বুঝে পেয়েছি" (Salary received) to leave your own digital signature — proof for both sides.
- How to create a class Before you can take attendance you create the class once. A one-time job.
- Make receipts and results look right — font and size Documents printing in an ugly font? Change it in one place and the receipt, result slip and certificate all change together.
- How to add students Enter each student's name and roll once. After that, daily attendance is just ticking boxes.
- How to add a whole class at once You do not have to type 40 names one by one. Type or paste the list and add everyone at once — no computer needed.